There is a specific, intoxicating aroma that defines the streets of Bangkok at dusk: the scent of caramelizing soy sauce, the sharp sting of chilies, and the sweet, anise-like perfume of fresh Thai basil hitting a white-hot wok. This Thai basil chicken fried rice is designed to replicate that exact sensory experience in your own kitchen. We are moving beyond a simple side dish to create a masterpiece of glossy jasmine rice grains, seared golden chicken pieces, and a dark mahogany glaze that provides deep, savory satisfaction in every bite.
Achieving the perfect Thai basil chicken fried rice requires more than just tossing ingredients in a pan; it is a study in heat management and texture. We are looking for individual, slightly charred grains of rice that carry the weight of an oyster-based umami glaze without ever becoming soggy. This guide will walk you through the professional techniques needed to produce those fluffy scrambled egg ribbons and blistered red bird’s eye chilies that make this dish visually stunning and culinarily superior.
The Anatomy of a Perfect Thai Basil Chicken Fried Rice
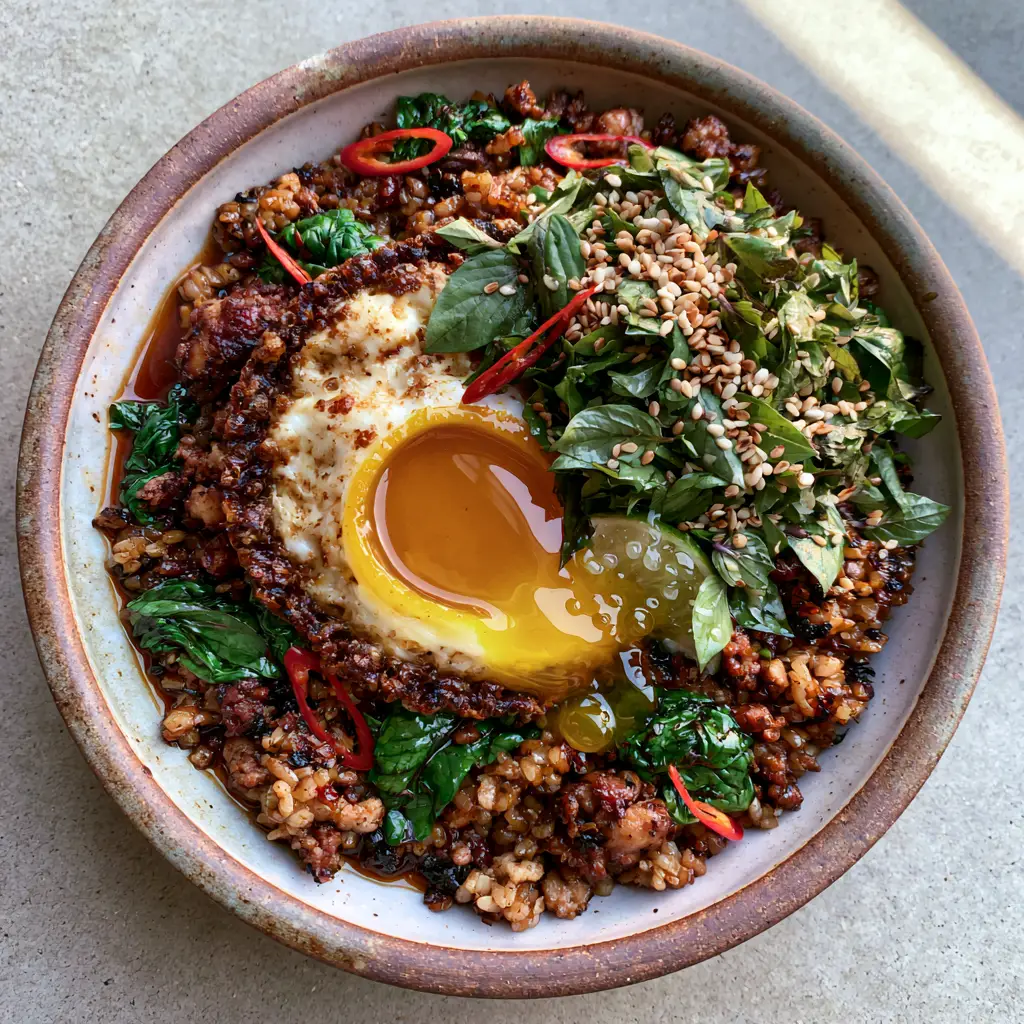
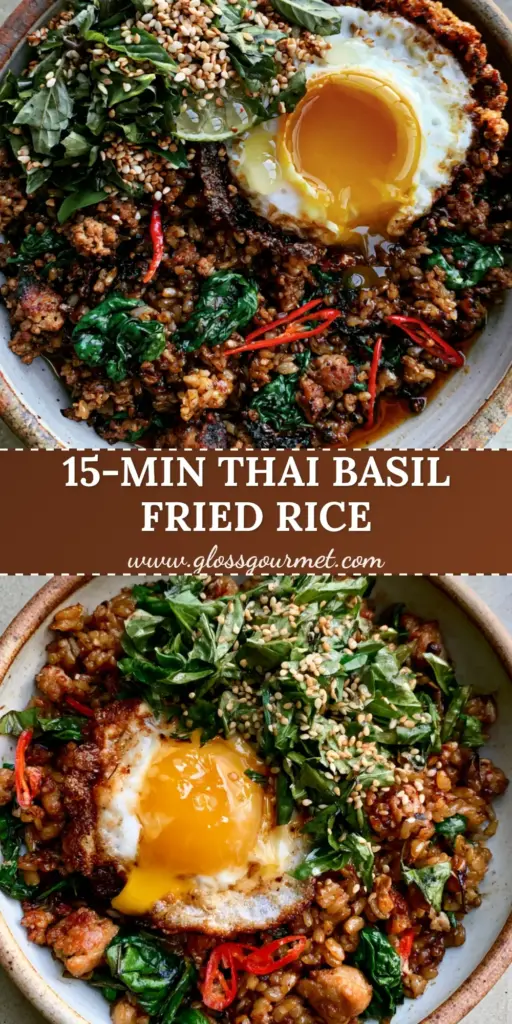
To master this recipe, we must first understand the visual and textural components that separate an average fried rice from a gourmet experience. Our “Visual Recipe Blueprint” dictates several critical elements that we will achieve through specific culinary science:
- The Mahogany Glaze: A balanced ratio of dark soy sauce for color and oyster sauce for viscous, salty depth.
- Wok Hei (Breath of the Wok): High-heat searing that creates slightly charred, glossy jasmine rice grains.
- Textural Contrast: Combining tender, golden-seared chicken breast with the softness of fluffy egg ribbons and the crunch of fresh green scallions.
- The Basil Punch: Using fresh Thai basil leaves—heavily folded into the rice at the final second to wilt them while retaining their vibrant aromatic oils.
Pantry Essentials for the Dark Mahogany Umami Glaze
The soul of this Thai basil chicken fried rice lies in its sauce. We aren’t just using standard soy sauce; we are building a complex flavor profile that coats each grain of rice in a thin, mahogany-colored veneer. You will need 2 tbsp (30ml) of oyster sauce, which acts as the thick, savory base of our glaze. This provides the “body” of the sauce that allows it to cling to the rice grains without pooling at the bottom of the wok.
Next, we incorporate 1 tbsp (15ml) of dark soy sauce. Unlike light soy sauce, dark soy is aged longer with molasses, providing that iconic deep color and a subtle sweetness that balances the heat of the bird’s eye chilies. For the necessary salt component, we add 1 tbsp (15ml) of light soy sauce or fish sauce. Finally, 1 tsp (5g) of granulated sugar is essential to trigger the Maillard reaction, helping the rice and chicken achieve those beautiful charred bits during the high-heat stir-fry process.
Choosing the Right Grain: The Science of Jasmine Rice
To achieve the “glossy jasmine rice grains” described in our visual blueprint, you cannot use freshly cooked rice. Fresh rice contains too much surface moisture, which leads to clumping and a “mushy” texture when combined with sauces. Instead, use 4 cups (600g) of day-old, chilled jasmine rice. During refrigeration, the starch molecules undergo a process called retrogradation, where they crystallize and toughen, allowing the grains to remain separate and resilient in the heat of the wok.
If you find yourself in a pinch and must use fresh rice, spread it out on a large baking sheet and place it in front of a fan for 30 minutes to dehydrate the surface. This technique is a favorite among professional chefs when they need to transition from boiling to stir-frying rapidly. For more inspiration on grain-based dishes, you might explore our classic chicken fried rice or even a more fusion approach like our Japanese BBQ chicken fried rice.
Essential Equipment for Authentic Wok-Seared Results
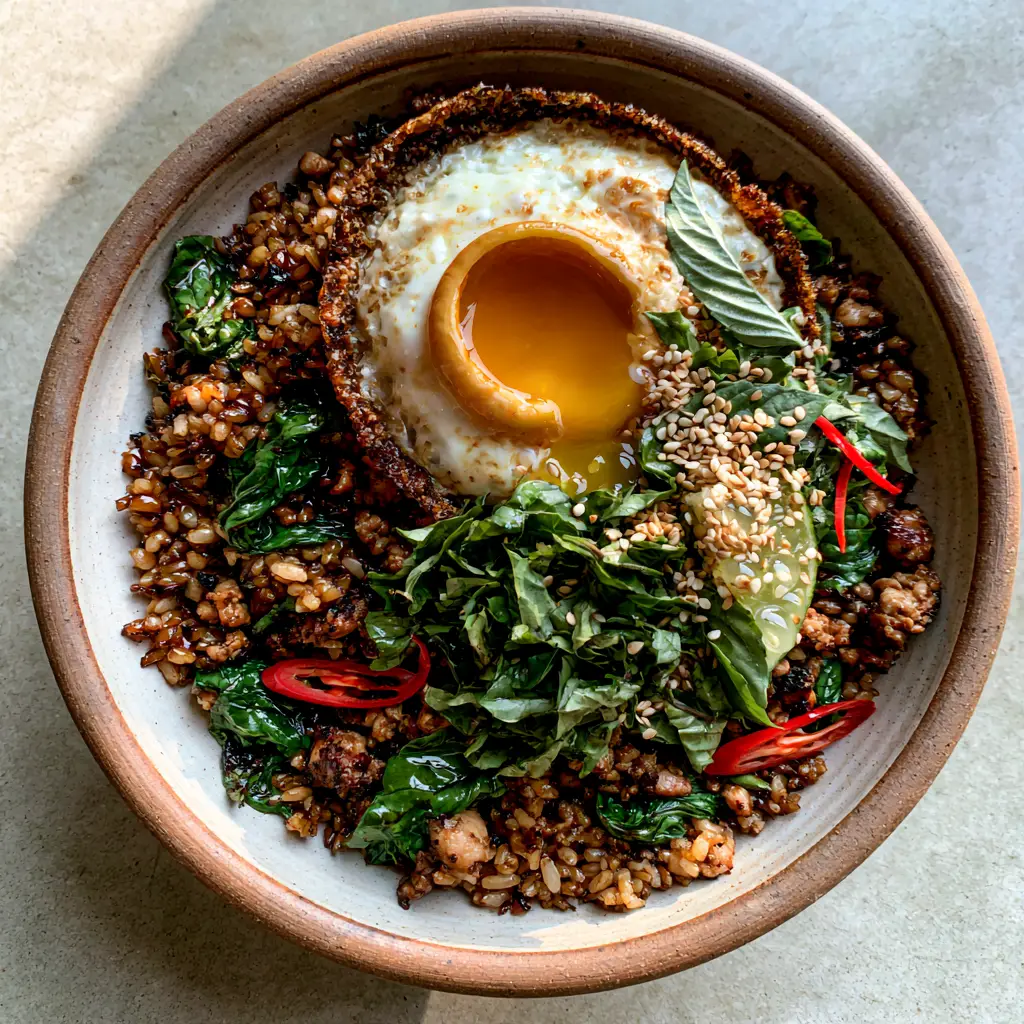
While a large non-stick skillet can work, a seasoned carbon steel wok is the gold standard for Thai basil chicken fried rice. Carbon steel responds almost instantly to temperature changes, allowing you to sear the chicken quickly without overcooking the center. The wide, sloping sides of the wok provide the surface area needed to “toss” the rice, ensuring every grain is evenly coated in the mahogany glaze and exposed to the high heat for that signature char.
You will also need a sturdy metal wok spatula (chuan). The thin edge of the spatula allows you to scrape the bottom of the wok effectively, preventing the minced garlic bits from burning while you scramble the egg ribbons. A high-smoke point oil, such as 3 tbsp (45ml) of canola or grapeseed oil, is mandatory. Avoid olive oil or butter, as they will smoke and turn bitter at the temperatures required to blister the bird’s eye chilies.
Prepping Your Aromatics: Garlic, Chilies, and Scallions
The “Visual Recipe Blueprint” emphasizes minced garlic bits and sliced red bird’s eye chilies. For the most authentic flavor, use 4-5 cloves (20g) of garlic and 3-5 red bird’s eye chilies (depending on your spice tolerance). Rather than just slicing the chilies, many Thai cooks prefer to pound the garlic and chilies together in a mortar and pestle. This releases the essential oils and juices, creating a flavor base that permeates the entire dish rather than just providing isolated spicy bites.
For the finishing touches, prep 3 large scallions (30g) by slicing them on a sharp bias. The white parts should be added early to soften and sweeten, while the bright green tops are reserved for the final garnish. This ensures you have layers of onion flavor—some mellow and cooked, some fresh and crisp—that contrast beautifully with the rich, wilted Thai basil leaves. If you enjoy fresh, vibrant vegetable profiles, our Thai mango salad is an excellent companion to this meal.
Step 1: Achieving the Golden Sear on the Chicken
Begin by cutting 1 lb (450g) of chicken breast into bite-sized, uniform pieces. Pat the chicken completely dry with paper towels; moisture is the enemy of a good sear. Heat 1 tbsp (15ml) of oil in your wok over high heat until it begins to shimmer and produce a faint wisp of smoke. Add the chicken in a single layer, resisting the urge to stir it immediately.
Listen for a vigorous sizzling sound—this is the sound of water evaporating and proteins browning. Let the chicken sit undisturbed for about 2 minutes until a deep golden-brown crust forms. This crust provides the “seared golden chicken pieces” required by our visual blueprint. Once seared, toss the chicken for another minute until just cooked through, then remove it from the wok and set aside. This prevents the chicken from becoming rubbery while we focus on the rice.
Step 2: Creating the Fluffy Scrambled Egg Ribbons
Wipe the wok clean if necessary, add another 1 tbsp (15ml) of oil, and pour in 2 large, lightly beaten eggs. Use your spatula to swirl the eggs around the hot surface. As the eggs set, push them toward the edges of the wok, allowing the uncooked liquid to hit the center. This creates thin, wide “ribbons” of egg rather than small, dense curds.
Once the eggs are 80% cooked—meaning they still look slightly wet—break them into large pieces and push them to the side of the wok. We want these “fluffy scrambled egg ribbons” to be visible in the final dish, so avoid over-chopping them. The residual heat of the rice will finish the cooking process, ensuring they remain tender and delicate.
Step 3: Blistering the Aromatics and Charring the Rice
Add the final 1 tbsp (15ml) of oil to the center of the wok. Drop in your garlic and chili mixture. You should immediately smell the pungent garlic and the sharp, spicy air from the chilies. Sauté for only 15-30 seconds until the garlic turns a pale golden color. Do not let it turn dark brown, or it will taste bitter. This step is where we create the “blistered red bird’s eye chili slices” that provide the dish’s signature heat.
Immediately add the 4 cups (600g) of day-old jasmine rice. Using the back of your spatula, press the rice into the hot surface of the wok. Let it sit for 30 seconds to pick up some char, then toss and repeat. This “press and toss” method ensures the grains are individual and glossy, rather than clumped together. Pour your mahogany sauce mixture over the rice and toss vigorously until every grain is transformed into a deep, savory brown.
Step 4: The Final Fold of Thai Basil and Scallions
Return the seared chicken and the white parts of the scallions to the wok. Toss for 1 minute to allow the flavors to meld and the chicken to reheat. Now, turn off the heat. This is a critical professional tip: Thai basil is delicate. If you cook it over high heat for too long, it loses its vibrant green color and its unique spicy-sweet aroma. Add 1 cup (30g) of fresh Thai basil leaves and the green scallion tops.
Fold the leaves into the hot rice. The residual heat will be just enough to create the “wilted Thai basil leaves” specified in our blueprint while keeping them “vibrant.” The leaves should wrap around the glossy grains of rice, releasing their scent just as the dish is served. Transfer the Thai basil chicken fried rice to a seasoned carbon steel wok or a rustic ceramic bowl for serving.
Expert Tips for Success
- Cold Rice is King: Always use rice that has been refrigerated for at least 12 hours. If the rice feels too hard, gently break up the clumps with clean, wet hands before adding it to the wok.
- Don’t Overcrowd the Pan: If you are doubling the recipe, cook it in two batches. Overcrowding drops the temperature of the wok, leading to steamed rice instead of fried rice.
- The Lime Wedge Secret: Always serve with a fresh lime wedge. The citric acid cuts through the richness of the oyster sauce and brightens the anise notes of the basil.
- High Heat is Mandatory: If your stove isn’t powerful, let the wok heat up for a full 3-5 minutes before starting. You want that “macro, handheld photo” look with charred grains.
Storage, Reheating, and Freezing
Leftover Thai basil chicken fried rice is arguably even better the next day as the flavors continue to develop. Store any leftovers in an airtight container in the refrigerator for up to 3 days. To reheat, add a splash of water or chicken broth to a skillet over medium-high heat. The steam will help re-moisturize the grains without making them greasy.
We do not recommend freezing this specific dish. The delicate textures of the wilted basil and the fluffy egg ribbons do not survive the freezing and thawing process well, often becoming slimy or rubbery. For best results, enjoy this dish fresh from the wok while the aromas are at their peak.
What to Serve With Thai Basil Chicken Fried Rice
This dish is a complete meal on its own, but it pairs beautifully with other vibrant Asian-inspired flavors. To balance the heat, consider a crisp green Thai mango salad or a refreshing peach arugula salad for a fusion twist. If you are looking for more protein options to serve alongside, a sesame ginger tuna steak provides a sophisticated contrast to the rustic nature of the fried rice.
For those who love noodle textures as much as rice, you might also enjoy exploring our ramen noodle salad or a spicy Asian noodle salad for your next meal prep session. The goal is to balance the salty, savory mahogany glaze of the rice with something bright, acidic, or crunchy.
Frequently Asked Questions
While Italian basil works in a pinch, it lacks the anise and peppery notes of Thai basil. If substituting, use slightly less and add a pinch of black pepper.
Heat your wok until it’s smoking before adding oil. Use a high-smoke point oil and let the rice sit undisturbed for 30 seconds to develop a slight char.
Yes, they are quite potent. For a milder dish, remove the seeds or reduce the number of chilies. The mahogany glaze helps balance the heat.
Chicken breast is traditional for a clean sear, but chicken thighs offer more fat and flavor. Both should be cut into uniform, bite-sized pieces for even cooking.
Soggy rice usually comes from using freshly cooked rice or overcrowding the wok. Use day-old, chilled rice and cook in batches to ensure the grains fry rather than steam.
The Master Recipe: Authentic Thai Basil Chicken Fried Rice
Thai Basil Chicken Fried Rice: The Ultimate Wok-Seared Umami Guide
Ingredients
Equipment
Method
- In a small bowl, whisk together the oyster sauce, dark soy sauce, light soy sauce, and sugar until the sugar is dissolved.
- Mince the garlic and slice the bird's eye chilies. Separate the white and green parts of the sliced scallions.
- Heat 1 tbsp (15ml) oil in a wok over high heat. Add chicken pieces in a single layer and sear until deep golden-brown (about 2-3 mins). Remove and set aside.
- Add 1 tbsp (15ml) oil to the wok. Pour in beaten eggs, swirling to form thin ribbons. Cook until fluffy but slightly wet, then push to the side.
- Add final 1 tbsp (15ml) oil. Sauté garlic and chilies for 20 seconds. Add jasmine rice, pressing into the wok to char. Pour sauce over rice and toss until mahogany-colored.
- Return chicken to the wok with scallion whites. Toss to heat through. Turn off heat and fold in fresh Thai basil leaves and scallion greens until wilted and vibrant.
Notes
Turn off the heat before adding basil to preserve its color and aroma.
Closing & Call to Action
Mastering Thai basil chicken fried rice is a rite of passage for any home cook looking to capture the essence of Thai street food. With its glossy grains, golden chicken, and the unmistakable aroma of wilted basil, this dish is a guaranteed crowd-pleaser that looks as good as it tastes. We hope this guide helps you achieve that perfect mahogany glaze and wok-seared char in your own kitchen.
If you enjoyed this recipe, please leave a comment below and let us know how your wok-searing went! Don’t forget to sign up for our newsletter for more elite culinary blueprints. You can also save this recipe to your favorite boards on Pinterest to ensure you always have the secret to the perfect fried rice at your fingertips.