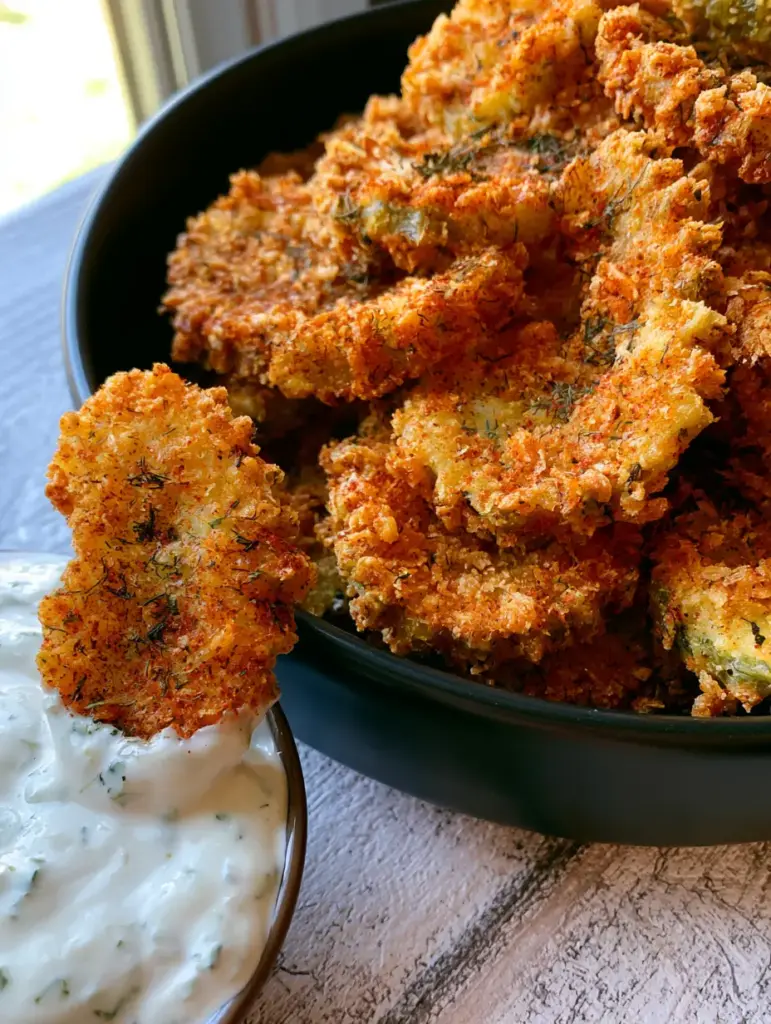
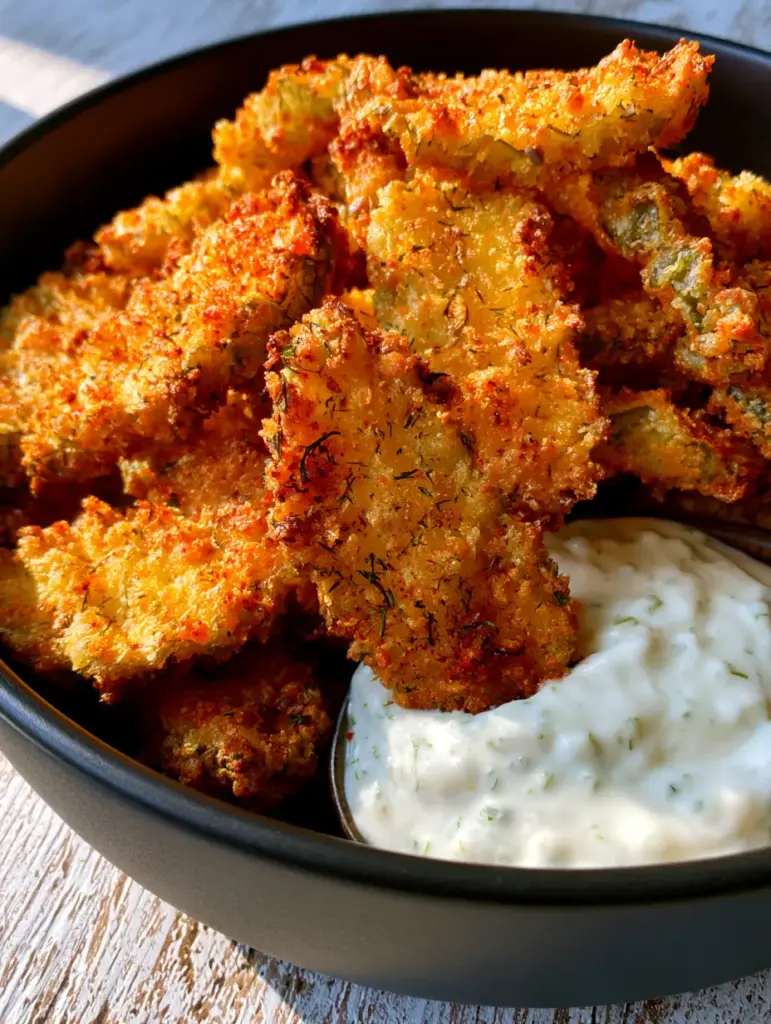
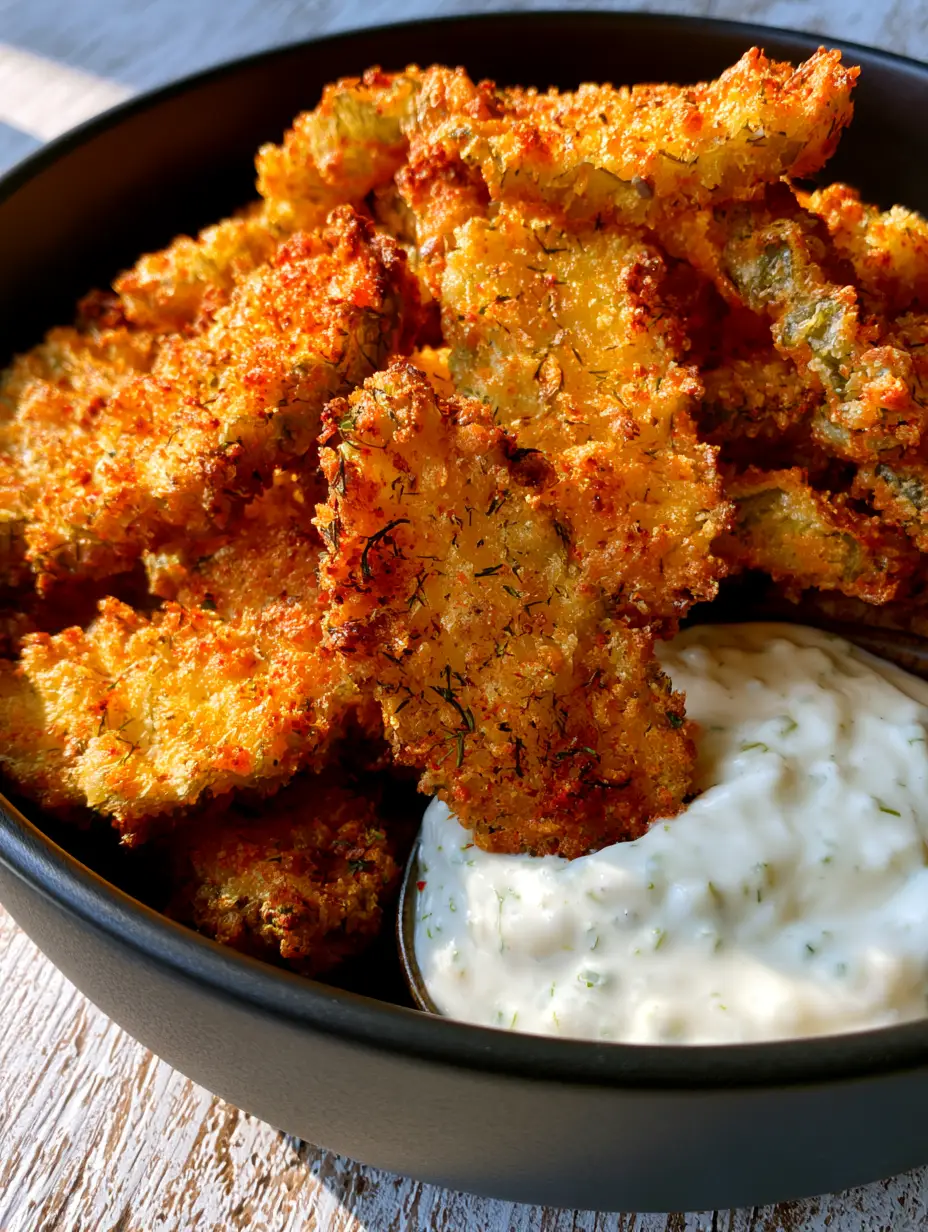
There is a specific, primal satisfaction that comes from the perfect crunch, and these Dill Pickle Chips deliver exactly that. Imagine a pile of extra-thick crinkle-cut pickles, each one encased in a jagged, deeply golden-brown crust of panko breadcrumbs that shatters the moment you bite into it.
Captured in the soft natural daylight of a rustic kitchen, these chips aren’t just a snack; they are a textural masterpiece. Each chip is dusted with a vibrant smoked paprika “rust” and flecked with dried dill weed, creating a flavor profile that is as complex as it is addictive.
Whether you are serving them in a matte black ceramic bowl for a modern gathering or dipping them into a thick, creamy bowl of herb-flecked ranch, these Dill Pickle Chips are designed to be the star of the show. Let’s dive into the science of the “shatter-crisp” coating.
Why You’ll Crave These Deeply Golden Crinkle-Cut Chips
- The Shatter-Crisp Factor: By utilizing air-fryer technology and high-heat panko, we achieve an incredibly jagged and crisp exterior that rivals any deep-fryer.
- Visual Masterpiece: The contrast between the golden-brown breadcrumbs, the green flecks of dried dill, and the bright “dusting” of smoked paprika makes these visually stunning.
- The Perfect Dip Vehicle: Each extra-thick crinkle-cut slice is structurally sound enough to scoop up a massive amount of thick, herb-heavy ranch dressing.
- Zesty Flavor Profile: We amplify the natural brine of the pickle with additional smoked paprika and fresh chive garnishes for a gourmet finish.
The Secret Pantry Staples for Perfect Crinkle-Cut Crunch
To achieve the visual and textural results seen in our professional food photography, every ingredient serves a structural or aesthetic purpose. We aren’t just breading pickles; we are building a crispy architecture.
Extra-Thick Crinkle-Cut Dill Pickles: You need 2 cups (approx. 500g) of thick-cut slices. The ridges of the crinkle-cut are essential as they provide more surface area for the panko to latch onto, creating those signature jagged edges.
Toasted Panko Breadcrumbs: Use 1.5 cups (90g) of Japanese-style panko. Unlike standard breadcrumbs, panko has a flaky, shard-like structure that reflects light and provides the “shatter” effect when air-fried.
Smoked Paprika: We use 1 tsp (2g) of smoked paprika. This provides that “deeply golden-brown” hue and a subtle earthy undertone that complements the vinegar in the pickles.
Dried Dill Weed: You will need 1 tbsp (2g) of dried dill. We use dried here instead of fresh in the breading because it withstands the high heat of the air fryer without burning, maintaining those visible green specks.
All-Purpose Flour: Use 0.5 cups (65g) of flour. This is your “primer” layer, absorbing the surface moisture of the pickle so the batter doesn’t slide off during the cooking process.
Buttermilk and Egg: Combine 0.5 cups (120ml) of buttermilk with 1 large egg. This thick, acidic wash creates a protein-rich “glue” that ensures your panko coating stays anchored to the ridges of the chip.
Foundational Seasonings: Don’t forget 0.5 tsp (3g) of kosher salt and 0.5 tsp (1g) of cracked black pepper. While the pickles are salty, the breading needs its own seasoning to avoid a bland crust.
Fresh Chives: A small bunch (approx. 10g) of finely chopped chives. These are used as a final garnish to add a pop of fresh green and a mild onion bite that cuts through the richness of the ranch.
Essential Tools for Air-Fried Perfection
To get that handheld smartphone photo-ready look, you need the right gear. A high-quality air fryer is non-negotiable for achieving the “jagged crispy edges” without the grease of a deep fryer.
You will also need a three-bowl dredging station. This prevents cross-contamination and ensures that your “shatter-crisp” coating remains light and airy rather than gummy and thick.
Finally, a matte black ceramic bowl is the ideal vessel for serving. The dark background makes the golden-brown tones of the Dill Pickle Chips pop, highlighting the “dusting” of paprika and dill flecks.
The Culinary Blueprint: Mastering the Shatter-Crisp Coating
Step 1: The Critical Moisture Removal
The biggest enemy of a crispy Dill Pickle Chip is moisture. Take your 2 cups (500g) of extra-thick crinkle-cut slices and lay them out on a double layer of paper towels.
Press another paper towel firmly on top. You want the surface of the pickles to be as bone-dry as possible so the flour can adhere perfectly to every ridge and valley.
Step 2: Constructing the Dredging Station
In bowl one, place your 0.5 cups (65g) of flour. In bowl two, whisk together the 0.5 cups (120ml) of buttermilk and 1 large egg until fully emulsified.
In bowl three, combine the 1.5 cups (90g) of panko, 1 tbsp (2g) of dried dill weed, and 1 tsp (2g) of smoked paprika. Mix thoroughly until the panko is evenly “dusted” with the red and green spices.
Step 3: The Three-Stage Breading Process
Toss a few pickle slices in the flour, shaking off any excess. Dip them into the buttermilk mixture, ensuring the liquid gets into all the crinkle-cut grooves.
Finally, press the pickles into the panko mixture. Use your fingers to manually press the breadcrumbs into the surface. This creates the “jagged and shatter-crisp” texture we are looking for.
Step 4: Air-Frying for Visual Accuracy
Preheat your air fryer to 400°F (200°C). Arrange the chips in a single layer in the basket, ensuring they do not touch. This allows the hot air to circulate around those jagged edges.
Lightly spray the tops with a high-smoke-point oil (like avocado oil). Air fry for 8-10 minutes. At the 5-minute mark, flip the chips and give them another light spray of oil.
Visual Cue: Watch for the panko to turn a deep, mahogany golden-brown. You want to see the smoked paprika “glow” against the toasted breadcrumbs. The edges should look sharp and brittle.
Expert Tips for Success
- Don’t Overcrowd: If you stack the chips, the steam will make the panko soggy. Cook in batches to maintain that “shatter-crisp” integrity.
- The Oil Spray: A light coating of oil is the “invisible ingredient” that bridges the gap between air-frying and deep-frying. It’s what gives you that professional, glistening finish.
- The Chill Factor: For the absolute best results, place your breaded (but uncooked) chips in the freezer for 10 minutes before air-frying. This sets the “glue” and prevents the coating from falling off.
- Pickle Selection: Use “refrigerated” style pickles rather than shelf-stable ones for a firmer, snappier interior bite.
The Ideal Pairings for Dill Pickle Chips
These chips are incredibly versatile and serve as the perfect salty side dish for a variety of meals. If you’re looking for a hearty lunch, pair them with a classic chicken club sandwich. The acidity of the pickles cuts through the richness of the bacon and mayo perfectly.
If you’re hosting a dinner and want something a bit lighter, these chips offer a great textural contrast to a fresh vermicelli noodle salad or as a crunchy side for one-pan balsamic chicken.
For those who love a “crispy on crispy” plate, try serving these alongside some crispy potato bites for the ultimate appetizer spread.
Preserving the Crunch: Storage and Reheating
Dill Pickle Chips are best enjoyed immediately while the panko is at its peak “shatter” stage. However, if you have leftovers, store them in an airtight container in the refrigerator for up to 2 days.
To reheat, do NOT use a microwave, as this will turn the breading into a soggy mess. Instead, pop them back into the air fryer at 375°F (190°C) for 2-3 minutes until they regain their signature jagged crunch.
Dill Pickle Chips FAQs
Yes, though the air fryer is superior for the ‘shatter-crisp’ finish. Bake at 425°F (220°C) on a wire rack over a baking sheet for 15-20 minutes until deeply golden.
Yes, if you follow the flour-buttermilk-panko sequence. The flour acts as a primer, and the buttermilk-egg mix acts as a strong glue for the breadcrumbs.
The secret is the smoked paprika and a light spray of oil. The oil conducts heat to the panko shards, while the paprika provides that rich, toasted visual hue.
Extra-thick crinkle-cut dill pickles are best. The ‘refrigerated’ jars (like Claussen) tend to stay crunchier than shelf-stable ones after cooking.
Sogginess is usually caused by excess moisture. Ensure you pat the pickles bone-dry with paper towels before breading and don’t overcrowd the air fryer basket, which causes steaming.
The Ultimate Shatter-Crisp Air-Fried Pickle Recipe
Dill Pickle Chips: The Ultimate Air-Fried Shatter-Crisp Guide
Ingredients
Equipment
Method
- Place the crinkle-cut pickles on paper towels and pat them completely dry. Any residual brine will cause the breading to fall off.
- Arrange three bowls: flour in the first; whisked egg and buttermilk in the second; panko, dill, paprika, and salt in the third.
- Coat each pickle slice in flour, dip in buttermilk, and then press firmly into the panko mixture until jaggedly coated.
- Place in a single layer in the air fryer at 400°F (200°C). Spray with oil and cook for 8-10 minutes, flipping halfway through until deeply golden-brown.
- Serve in a bowl topped with fresh chives and a side of creamy ranch dressing.
Notes
Spray the chips generously with oil mid-way through for that deep-fried golden look.
Closing & Call to Action
Mastering the art of the Dill Pickle Chip is a rite of passage for any home cook who loves a bold, zesty snack. With their jagged edges, deeply golden-brown crust, and that irresistible dip into cool ranch, these are guaranteed to be a hit at your next gathering.
If you made these and loved that shatter-crisp texture, please leave a comment below! Don’t forget to save this recipe to your “Snack Goals” board on Pinterest so you can find it whenever the pickle craving strikes.