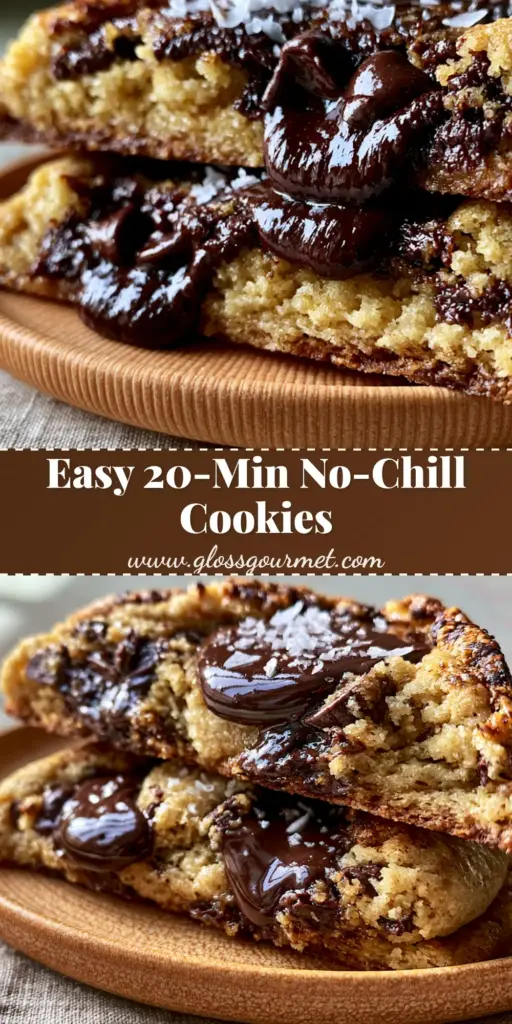
There is nothing quite like the aroma of a freshly baked chocolate chip cookie recipe wafting through a home. It is a universal scent of comfort, yet achieving that elusive “bakery-style” perfection—with its thick, caramelized edges and molten centers—often feels like a culinary mystery. Today, we are demystifying the process to help you create a cookie that looks exactly like a professional food photograph.
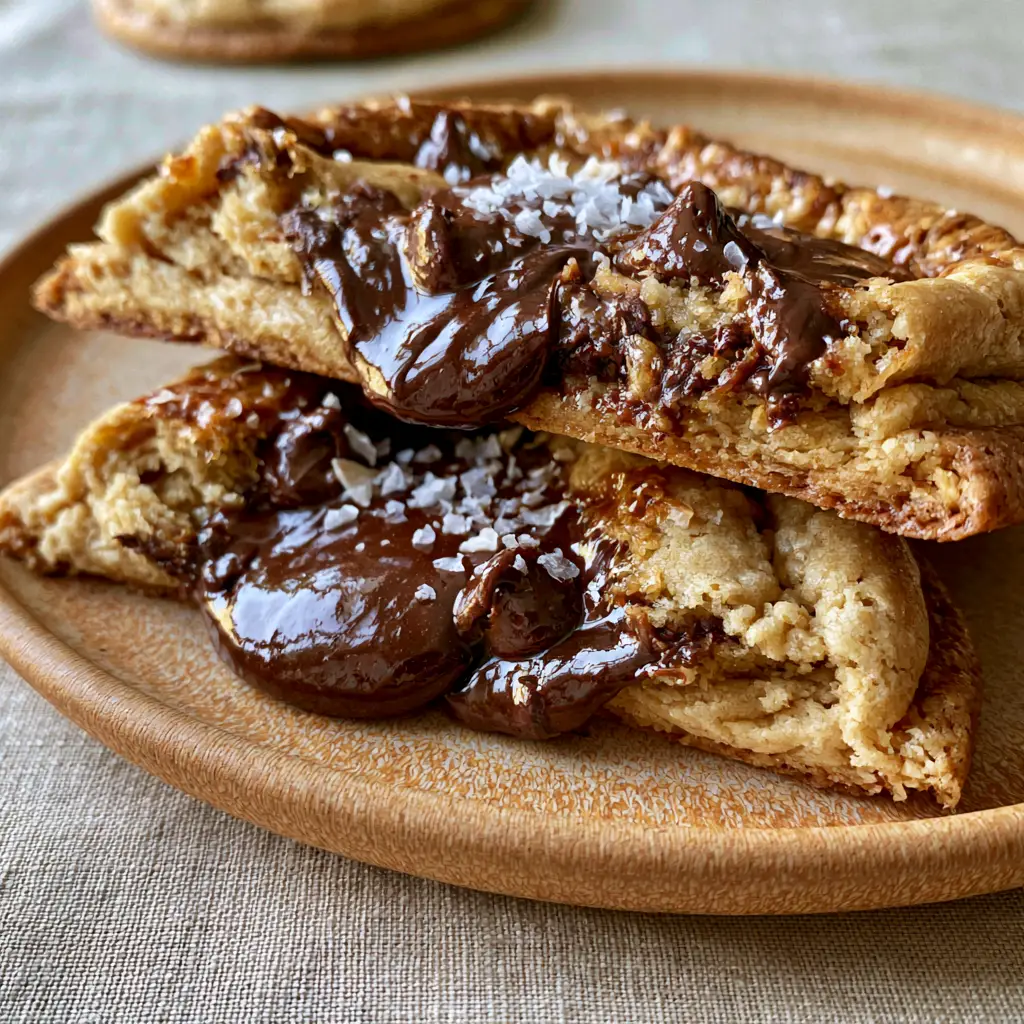
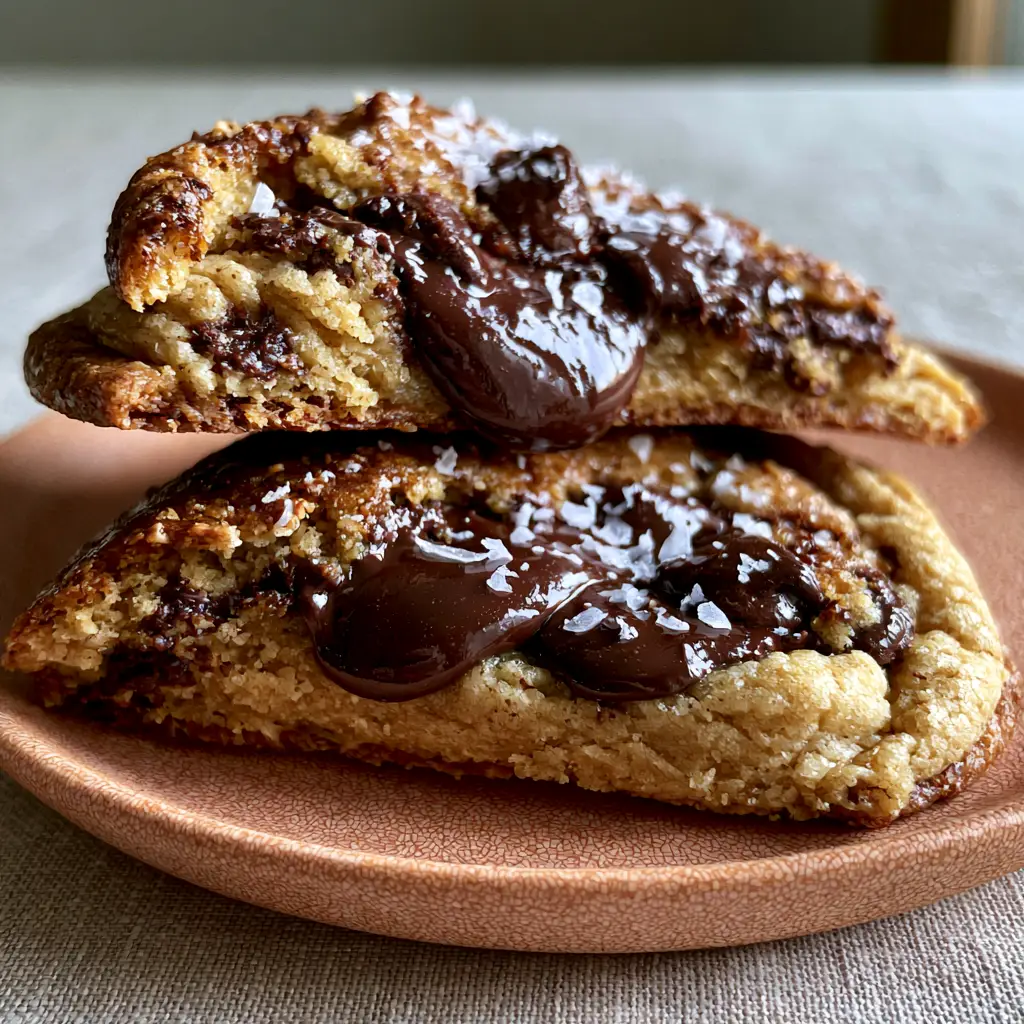
Imagine breaking open a warm cookie to reveal an ultra-thick, soft, and chewy center that practically melts on your tongue. We are talking about deep, caramelized flavor notes from brown butter, glossy pools of high-quality dark chocolate, and the sharp, sophisticated finish of flaky Maldon sea salt. This is not just another snack; it is a masterclass in texture and taste.
To master this chocolate chip cookie recipe, we have to look beyond the back of the bag. We are utilizing professional techniques like browning butter and strategic dough chilling to ensure every bite is a perfect balance of salt, sugar, and fat. Whether you are a seasoned baker or just starting out, this guide will provide the sensory cues you need to achieve gourmet results every single time.
Why This Thick Brown Butter Cookie Works
- The Brown Butter Base: By toasting the milk solids in the butter, we create a nutty, toasted aroma that elevates the dough from sweet to complex.
- Textural Contrast: A high flour-to-butter ratio combined with a specific chilling time ensures golden-brown caramelized edges and a soft, doughy interior.
- Dark Chocolate Pools: Instead of standard chips, we use chopped dark chocolate bars to create those iconic, glossy oozing centers.
- Salted Finish: The addition of flaky Maldon sea salt cuts through the richness of the dark chocolate, highlighting the caramelized notes of the dough.
The Secret Pantry Staples for Bakery-Style Cookies
1 cup (227g) Unsalted Butter: We start with high-quality butter because we are going to melt and brown it, concentrating the flavor and removing water content for a chewier texture.
1 cup (200g) Dark Brown Sugar: The high molasses content in dark brown sugar is essential for achieving that deep, caramelized brown butter cookie dough appearance and a moist, soft crumb.
1/2 cup (100g) Granulated White Sugar: While brown sugar provides moisture, white sugar is what allows those edges to crisp up and turn a beautiful golden brown during the bake.
2 Large Eggs (Room Temperature): Eggs provide the structure; using room temperature eggs ensures they emulsify perfectly into the fat, preventing a greasy dough.
2 tsp (10ml) Pure Vanilla Extract: A foundational aromatic that bridges the gap between the salty butter and the bitter dark chocolate.
2.5 cups (312g) All-Purpose Flour: The backbone of our chocolate chip cookie recipe, providing enough protein to keep the cookies thick and prevent excessive spreading.
1 tsp (5g) Baking Soda: This leavening agent reacts with the acidic brown sugar to create lift and contributes to the browning of the cookie edges.
1/2 tsp (3g) Fine Sea Salt: This is mixed into the dough to enhance all other flavors, ensuring the cookie isn’t just “sweet” but deeply flavorful.
1.5 cups (255g) Dark Chocolate (60% Cacao or higher), Chopped: Using a bar instead of chips allows the chocolate to melt into “pools” rather than holding its shape.
1 tbsp (10g) Flaky Maldon Sea Salt: The final visual and flavor flourish that gives these cookies their professional, handheld smartphone-photo-ready finish.
Essential Tools for the Perfect Bake
To achieve the “ultra-thick” look seen in our visuals, you will need a few specific tools. A heavy-duty stainless steel saucepan is vital for browning the butter, as it allows you to see the color change of the milk solids clearly. A large cookie scoop (roughly 3 tablespoons) is the secret to getting that uniform, thick shape that doesn’t flatten out.
We also recommend using parchment paper or a silicone mat on a light-colored baking sheet. Dark baking sheets absorb more heat and can lead to burnt bottoms before the center is cooked. If you are looking for more baking inspiration after mastering this, check out our expert baking techniques for another challenge.
The Step-by-Step Guide to Perfect Brown Butter Cookies
Mastering the Brown Butter Technique
In a medium saucepan over medium heat, melt the 1 cup (227g) of unsalted butter. Continue cooking, whisking constantly, as the butter begins to foam and pop.
Watch for the “Visual Cue”: The milk solids will turn a deep amber brown and the butter will smell intensely nutty. Immediately remove from heat and pour into a large heat-proof bowl to stop the cooking process; let it cool for 10 minutes.
Creaming the Sugars and Aromatics
Add the 1 cup (200g) of dark brown sugar and 1/2 cup (100g) of white sugar to the browned butter. Whisk vigorously by hand for about 2 minutes until the mixture looks like wet sand and the sugar has begun to dissolve.
Add the 2 eggs and 2 tsp (10ml) of vanilla. Whisk again until the batter lightens in color and becomes slightly ribbon-like in texture, which ensures a soft, chewy dough interior.
Folding the Dry Ingredients and Chocolate
In a separate bowl, whisk the 2.5 cups (312g) of flour, 1 tsp (5g) of baking soda, and 1/2 tsp (3g) of fine salt. Slowly fold the dry ingredients into the wet ingredients using a spatula.
Stop mixing when only a few streaks of flour remain, then fold in the 1.5 cups (255g) of chopped dark chocolate. You want to see large chunks of chocolate distributed throughout the thick caramelized brown butter cookie dough.
The Critical Chill Phase
Scoop the dough into large balls (about 3 tablespoons each) and place them on a tray. Chill the dough balls in the refrigerator for at least 2 hours, or ideally overnight.
Chilling the dough is what prevents the cookies from spreading too thin, ensuring that “ultra-thick” center. If you’re hungry now, consider a quick snack like creative avocado toast while you wait for the dough to set.
Baking for the Perfect Texture
Preheat your oven to 350°F (175°C). Space the chilled dough balls 3 inches apart on your prepared baking sheet.
Bake for 10-12 minutes. Look for the “Visual Cue”: The edges should be golden-brown and set, but the centers should still look slightly soft and underbaked. They will firm up as they cool on the pan.
The Final Flourish
Immediately upon removing the cookies from the oven, sprinkle a pinch of flaky Maldon sea salt over the melted dark chocolate pools. This is what creates that “glossy” and “delicate” look from our prompt.
Expert Tips for Cookie Success
- Don’t Overmix: Once you add the flour, mix only until combined. Overworking the dough develops gluten, which makes the cookies tough instead of tender.
- The “Scoot” Trick: If your cookies come out slightly irregular, use a large circular glass or cookie cutter to “scoot” the edges into a perfect circle while they are still hot.
- Measure by Weight: For the most consistent chocolate chip cookie recipe, use a kitchen scale. Flour is very easy to over-pack in a measuring cup.
- Room Temp Ingredients: Ensure your eggs are truly at room temperature so the fats don’t seize when mixed.
Storage, Reheating, and Freezing
These cookies are best enjoyed fresh when the chocolate is still in “glossy pools.” However, they store beautifully in an airtight container at room temperature for up to 4 days. To regain that fresh-baked texture, microwave a cookie for 10-15 seconds until the chocolate softens.
You can also freeze the pre-scooped dough balls for up to 3 months. When the craving hits, simply bake them directly from the freezer, adding 2 minutes to the total baking time. This makes them one of the best quick treats to have on hand.
What to Serve With This Sweet Treat
A rich, buttery cookie deserves a menu that balances the palate. If you are serving these as a grand finale to a dinner party, consider starting with a light fresh spinach salad or a sophisticated buttery sea bass. The contrast between a savory meal and a warm, salted chocolate cookie is unmatched.
For a more casual gathering, these cookies follow perfectly after a bowl of creamy mac and cheese. No matter the meal, the dark chocolate pools and caramelized dough will be the star of the show.
Frequently Asked Questions
Yes, but dark brown sugar contains more molasses, which contributes to the deep caramelized color and moisture level seen in professional bakery cookies.
Use high-quality dark chocolate bars chopped into chunks rather than standard chocolate chips. Chips contain stabilizers to help them hold their shape, while bars melt into glossy pools.
Flaky sea salt provides a textural crunch and acts as a flavor enhancer, cutting through the sweetness and highlighting the bitterness of the dark chocolate.
Chilling solidifies the fat in the dough. When you bake chilled dough, the fat takes longer to melt, which prevents the cookies from spreading too much and keeps them thick and soft.
Browning the butter removes water content and toasts the milk solids, creating a deep, nutty flavor and a chewier texture that regular melted butter cannot provide.
The Ultimate Brown Butter Chocolate Chip Cookie Recipe
The Ultimate Chocolate Chip Cookie Recipe: Thick, Brown Butter, and Gooey Centers
Ingredients
Equipment
Method
- Melt butter in a saucepan over medium heat. Whisk until foam subsides and brown bits appear. Pour into a bowl and cool for 10 minutes.
- Whisk browned butter with both sugars for 2 minutes. Add eggs and vanilla, whisking until the mixture is pale and thick.
- Fold in flour, baking soda, and fine salt until just combined. Fold in chopped dark chocolate chunks.
- Scoop 3-tbsp balls onto a tray and refrigerate for at least 2 hours. This ensures the cookies stay thick and don't spread.
- Bake at 350°F (175°C) for 10-12 minutes until edges are golden but centers are still soft. Top with flaky salt immediately.
Notes
Use chopped chocolate bars instead of chips for better melting.
Share Your Baking Masterpiece!
We want to see your results! If you made this chocolate chip cookie recipe, did you get those perfect chocolate pools? Leave a comment below and tell us how yours turned out. Don’t forget to follow us and share your photos on Pinterest for more gourmet inspiration. Happy baking!