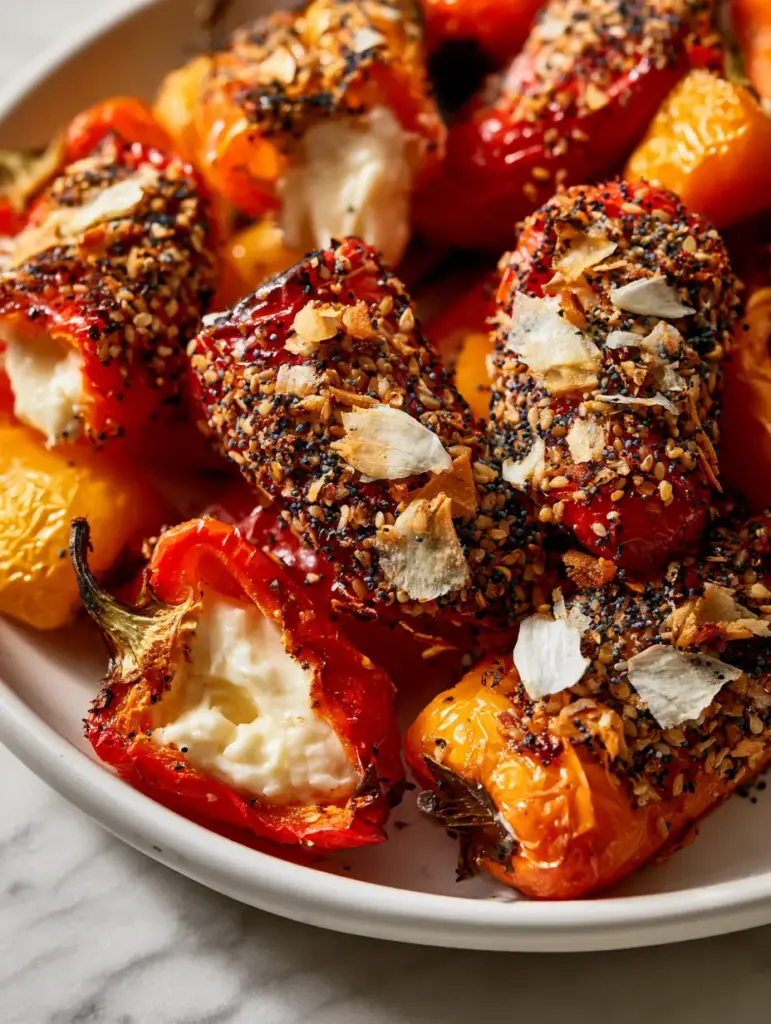
There is something undeniably hypnotic about the sizzle of cheese-stuffed mini peppers as they reach that perfect state of blistered perfection. Imagine a vibrant white ceramic platter overflowing with jewel-toned red, orange, and yellow mini bell peppers, their skins slightly puckered and sporting beautiful light char marks. As you bite into one, the snap of the pepper gives way to a steaming, pillowy white cream cheese filling that is ooey-gooey and rich.
Topped with a generous crust of everything bagel seasoning—crunchy toasted white sesame seeds, black poppy seeds, and savory flakes of garlic and onion—these peppers are a sensory masterpiece. Whether you are hosting a sophisticated cocktail hour or looking for a quick, low-carb snack, this air-fried recipe delivers an authentic food blog aesthetic with professional culinary results. The contrast between the sweet, charred pepper and the salty, garlicky crunch is simply unparalleled.
In this comprehensive guide, we will dive deep into the mechanics of achieving the perfect blister, the science of the “pillowy” filling, and why the air fryer is your best friend for this specific dish. We are moving beyond the basic appetizer and into the realm of gourmet finger foods that look as good as they taste.
Why You Will Crave These Air-Fried Stuffed Peppers
- Visual Brilliance: The contrast of the vibrant red, orange, and yellow skins against the snowy white cream cheese and dark poppy seeds makes this a centerpiece-worthy dish.
- Textural Harmony: You get the crunch of the everything bagel seasoning, the soft snap of the blistered pepper, and the velvety melt of warm cream cheese in every bite.
- Speed and Precision: Using an air fryer ensures that we get those iconic char marks without overcooking the pepper walls into mush.
- Naturally Low Carb: These are a fantastic alternative to traditional breaded appetizers, focusing on whole-food ingredients and high-quality fats.
The Essential Anatomy of Cheese-Stuffed Mini Peppers
To achieve the visual and culinary results seen in professional food photography, we must select our ingredients with forensic precision. Every element in this cheese-stuffed mini peppers recipe serves a structural and flavor-based purpose.
Mini Sweet Bell Peppers: You will need about 1 lb (450g) of peppers. Look for a mix of red, orange, and yellow for the best visual impact; these varieties have a higher sugar content than green peppers, allowing them to blister and caramelize beautifully under high heat.
Full-Fat Cream Cheese: Use 8 oz (225g) of high-quality brick cream cheese. We avoid the “whipped” variety from the tub because it contains too much air and will collapse under the heat of the air fryer; we want that “pillowy” look.
Avocado Oil: A light coating of 1 tbsp (15ml) is essential. Avocado oil has a high smoke point, which is necessary to achieve those light char marks without the oil breaking down or tasting bitter.
Toasted White Sesame Seeds: These provide a nutty, earthy base for our seasoning crust. We use 1 tbsp (9g) to ensure every pepper is heavily encrusted.
Black Poppy Seeds: These 2 tsp (6g) of seeds offer a tiny, distinct crunch and a beautiful dark contrast against the white filling.
Dried Garlic & Onion Flakes: We use 1 tbsp (10g) of each. These flakes rehydrate slightly from the steam of the cream cheese, releasing intense savory aromatics during the cooking process.
Coarse Sea Salt: A pinch of large salt flakes is vital. It provides a clean, sharp salinity that cuts through the richness of the dairy.
Pro-Level Tools for Blistering and Stuffing
To get the “authentic handheld smartphone photo” look, you need the right tools to handle the heat. While these peppers can be made in an oven, the air fryer is superior for achieving the specific blistered texture described in our blueprint.
First, an Air Fryer with a Perforated Basket is non-negotiable. The airflow needs to circulate 360 degrees around the peppers to ensure the bottom skins char just as well as the tops. If you use a solid baking sheet, you risk the peppers sitting in their own moisture and becoming soggy.
Second, a Small Offset Spatula or Piping Bag. To get that “bursting with filling” look, you need to pack the cream cheese deeply into the pepper cavity. A small spoon often leaves air pockets, whereas a piping bag ensures a dense, pillowy interior.
Finally, High-Heat Silicone Tongs. These peppers are delicate once charred. Metal tongs can tear the blistered skin, ruining the aesthetic. Silicone allows you to plate them with precision on your white ceramic platter.
The Science of the Perfect Blister: Step-by-Step
Preparing the Pepper Vessels
Start by washing and thoroughly drying your mini peppers. Moisture is the enemy of the blister; if the peppers are damp, they will steam rather than sear. Slice a thin sliver off the side of each pepper—rather than cutting them in half—to create a “boat.” This keeps the filling contained and allows for a more generous amount of cream cheese.
Remove the seeds and the white ribs. While mini peppers are mild, the ribs can sometimes have a bitter note that interferes with the sweetness of the charred skin. Lightly brush the exterior of each pepper with avocado oil, ensuring you cover the entire surface for even charring.
Whipping the Pillowy Cream Cheese Filling
In a small bowl, beat the 8 oz (225g) of cream cheese until it is smooth but still holds its shape. For an even creamier result, you can add 1 tsp (5ml) of heavy cream. Do not over-mix, as we want to maintain the structural integrity of the cheese so it doesn’t run out of the pepper during the air-frying process.
Stuff each pepper until the cheese is slightly mounded above the cut edge. This “overstuffing” technique is what creates that iconic “ooey-gooey” look once the cheese begins to melt and expand under the heat.
Applying the Everything Bagel Crust
In a shallow dish, combine your toasted sesame seeds, poppy seeds, garlic flakes, onion flakes, and sea salt. Take each stuffed pepper and press the cream cheese side firmly into the seasoning blend. You want a heavy encrustation that covers the entire white surface of the cheese.
This method ensures the seasoning sticks to the cheese and toasts perfectly while the peppers are in the air fryer. The garlic and onion flakes will turn a beautiful golden tan, matching the visual cues of our recipe blueprint.
Air Frying for Maximum Visual Impact
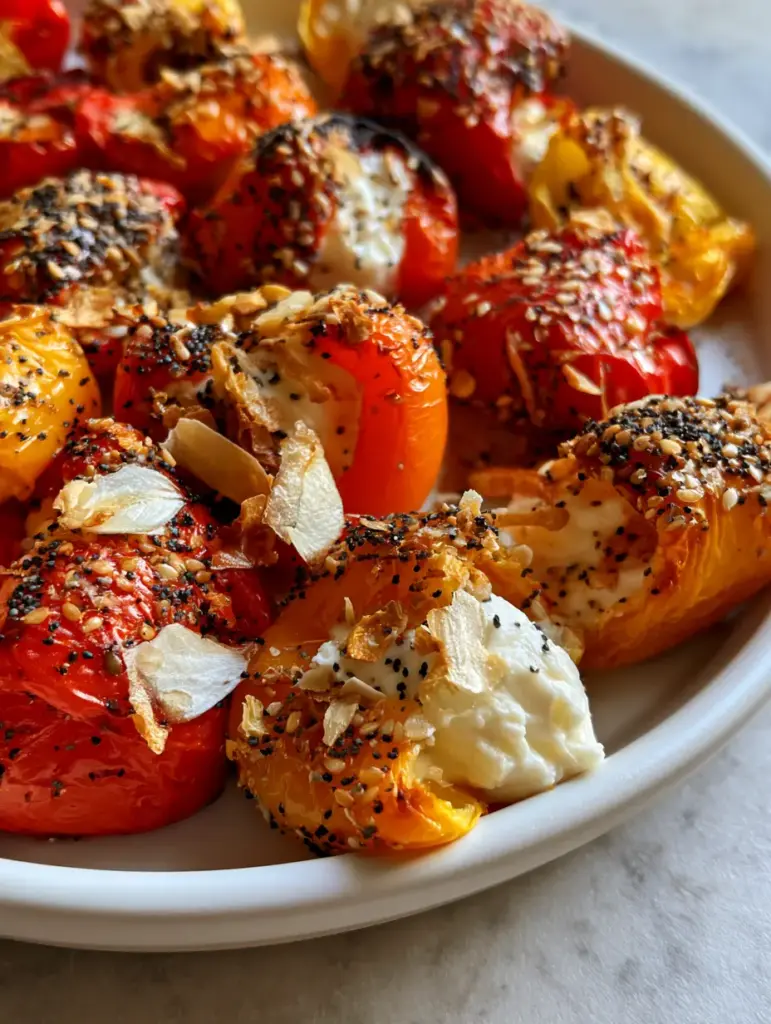
Preheat your air fryer to 400°F (200°C). This high heat is crucial. We want a short, intense cooking time (about 6-8 minutes) to blister the skins and melt the cheese without turning the pepper flesh into mush. The peppers should still have a slight structural “snap” when you bite into them.
Place the peppers in the basket in a single layer, ensuring they aren’t touching. This allows the hot air to hit the sides of the peppers, creating those beautiful light char marks on the edges. Watch for the sensory cues: the smell of toasted garlic will fill the kitchen, and you will hear a faint sizzling sound.
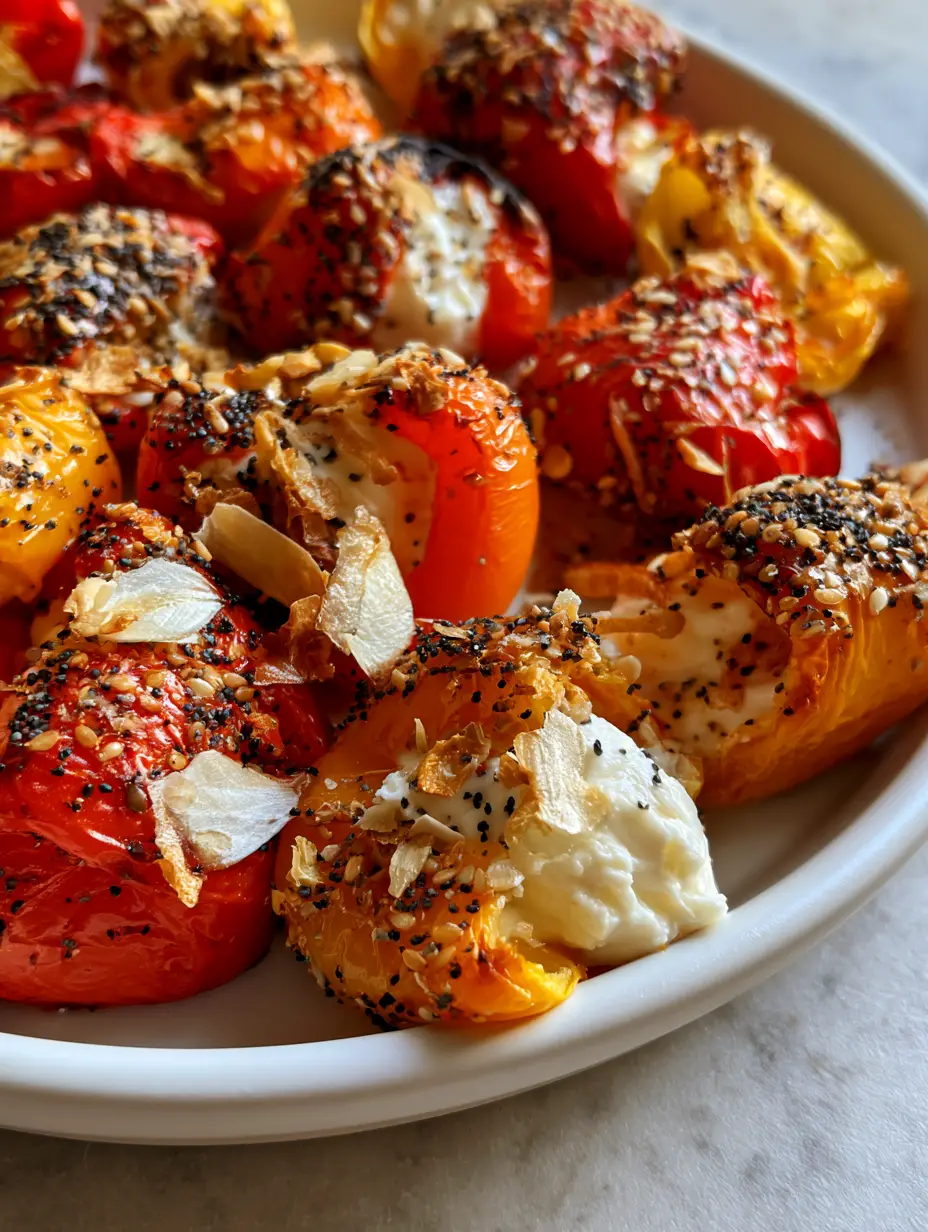
Remove the peppers when the skins are puckered and the cream cheese is steaming and slightly puffed. The garlic flakes should be golden, and the sesame seeds should look perfectly toasted.
Expert Tips for Appetizer Success
- Temperature Matters: Ensure your cream cheese is at room temperature before whipping. Cold cream cheese will be lumpy and won’t achieve that pillowy, smooth texture.
- Don’t Overcrowd: If you put too many peppers in the air fryer at once, the temperature will drop, and you’ll lose the blistered effect. Cook in batches if necessary.
- The Foil Trick: If your garlic flakes are browning too fast but your peppers aren’t charred enough, you can lightly tent the basket with foil for the last 2 minutes, though usually, 400°F for 6 minutes is the sweet spot.
- Salt Balance: If your “Everything Bagel” blend is pre-mixed, check the salt content. You may not need the extra coarse sea salt if the blend is already very salty.
Creative Pairings and Serving Suggestions
These cheese-stuffed mini peppers are incredibly versatile. For a full Mediterranean-inspired spread, consider serving them alongside a fresh spinach salad or some crispy cauliflower tacos for a vegetarian feast. The creamy filling of the peppers acts as a wonderful foil to spicy or acidic dishes.
If you are looking for a more substantial meal, these peppers make a great side dish for chicken vesuvio or even a light lunch when paired with creative avocado toast ideas. For those who love the stuffed pepper concept, you might also enjoy comparing these to our ricotta-stuffed mini peppers, which offer a lighter, tangier profile.
Storage, Reheating, and Make-Ahead Advice
Storage: These are best enjoyed fresh out of the air fryer. However, leftovers can be stored in an airtight container in the refrigerator for up to 3 days. Note that the “crunch” of the seasoning will soften over time.
Reheating: Avoid the microwave, as it will make the peppers rubbery. Instead, pop them back into the air fryer at 350°F (175°C) for 2-3 minutes until the cheese is warm and the skin regains some of its sizzle.
Freezing: We do not recommend freezing this recipe. The high water content in the peppers and the emulsion of the cream cheese will break upon thawing, resulting in a watery, unappealing texture.
Everything You Need to Know About Stuffed Peppers
Yes, they are naturally low-carb and high-fat, making them an excellent choice for a ketogenic or low-carb diet.
Yes, you can bake them at 400°F (200°C) for 10-12 minutes. However, the air fryer is superior for achieving the quick blistering and char marks without overcooking the pepper walls.
You can stuff and season the peppers up to 24 hours in advance and store them in the fridge. For the best visual results, air fry them just before serving to ensure the skins are blistered and the cheese is steaming.
Use full-fat brick cream cheese rather than whipped or tub varieties. Also, ensure you don’t cut the peppers completely in half; a small sliver off the side acts as a boat to keep the cheese contained.
No, it is savory and salty, focusing on garlic, onion, and sesame flavors. If you want heat, you can add a pinch of red chili flakes to the seasoning mix.
The Ultimate Cheese-Stuffed Mini Peppers Recipe

Cheese-Stuffed Mini Peppers: The Ultimate Air-Fried Everything Bagel Appetizer
Ingredients
Equipment
Method
- Wash and dry the peppers completely. Slice a small sliver off the side of each pepper and remove seeds and ribs.
- In a bowl, beat the softened cream cheese until smooth and pillowy. Transfer to a piping bag if desired.
- Fill each pepper cavity generously with cream cheese until slightly mounded.
- Mix the sesame seeds, poppy seeds, garlic, onion, and salt. Press the cheese-side of the peppers into the mixture until heavily encrusted.
- Brush pepper skins with oil. Air fry at 400°F (200°C) for 6-8 minutes until skins are blistered with light char marks and cheese is steaming.
Notes
Ensure peppers are bone-dry before oiling to get the best blistered skin.
Closing & Call to Action
Mastering these cheese-stuffed mini peppers is a rite of passage for any home cook looking to elevate their appetizer game. The combination of the air fryer’s intense heat and the savory crunch of the bagel seasoning creates a dish that is visually stunning and incredibly satisfying. Whether you’re slicing one open to reveal that steaming interior or serving them whole on a marble countertop, they are guaranteed to disappear in minutes.
Did you make these? We would love to see your blistered beauties! Leave a comment below, rate the recipe, and don’t forget to share your photos and follow us on Pinterest for more culinary inspiration. Happy air frying!