When it comes to achieving the ultimate pan-sear, few chefs command the flame quite like Bobby Flay. These Bobby Flay’s Chicken Thighs represent the pinnacle of home-cooked comfort, transformed into a restaurant-quality masterpiece through precise heat management and bold, smoky seasoning. Imagine a skin so crisp it crackles like glass—a “shattered” texture that gives way to succulent, juice-dripping meat beneath.
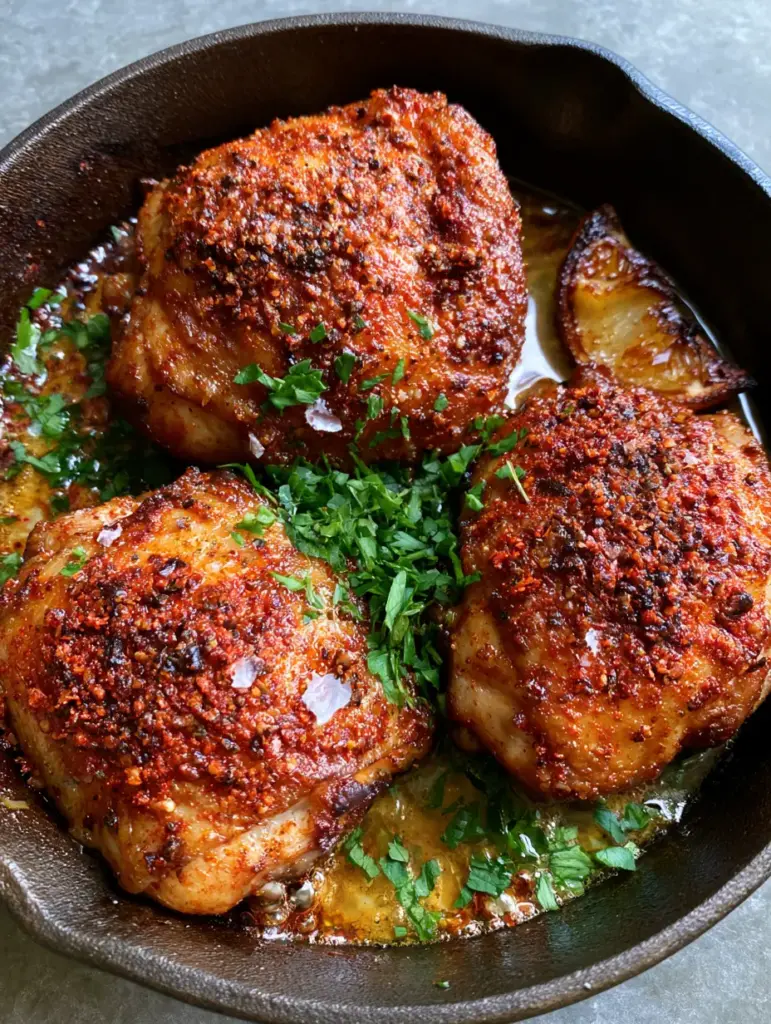
This recipe isn’t just about cooking poultry; it’s about the chemistry of rendered fat and the transformative power of a seasoned cast iron skillet. We are leaning into vibrant, red-orange hues from smoked paprika and the bright, fresh contrast of emerald-green parsley. By the time you pull this pan from the stove, you’ll have three perfectly seared thighs resting in a shimmering pool of liquid gold, accented by a caramelized, charred lemon wedge that cuts through the richness with surgical precision.
Whether you are a seasoned pro or an enthusiastic home cook, this method ensures your kitchen will smell like a high-end Manhattan grill. The visual appeal is undeniable: an intense golden-umber crust, visibly bubbly and jagged, dusted with Maldon sea salt that catches the morning light. Let’s dive into the forensic details of making these legendary Bobby Flay’s Chicken Thighs.
Why You Will Crave This Shattered Skin Technique
- The “Glass-Like” Crunch: Unlike standard pan-frying, this method focuses on slow-rendering the fat to create a bubbly, shattered skin texture that stays crispy even after resting.
- Bold Flavor Profile: The combination of smoked paprika and cracked black pepper creates a vibrant red-orange spice rub that infuses the skin with deep, smoky undertones.
- One-Pan Efficiency: We utilize a single seasoned cast iron skillet, ensuring that every drop of rendered chicken fat stays in the pan to flavor the meat and char the lemons.
- Visual Masterpiece: From the bright emerald-green parsley to the charred, caramelized lemon, this dish is designed to look as good as it tastes, matching the aesthetic of a professional food shoot.
The Blueprint: Essential Ingredients for High-Impact Flavor
To recreate Bobby Flay’s Chicken Thighs, we need to look beyond the surface. While the blueprint identifies the visible stars, the “invisible” ingredients are what make the science work. Salt isn’t just a seasoning here; it’s a desiccant that pulls moisture from the skin to ensure that shattered crunch.
The Protein Foundation
3 Bone-In, Skin-On Chicken Thighs (approx. 1.5 lbs / 680g): Bone-in thighs are essential for thermal mass, ensuring the meat stays juicy while the skin undergoes a prolonged sear. Skin-on is non-negotiable, as the skin provides the fat necessary for the “shattering” effect.
The Signature Dry Rub
1 tbsp (7g) Smoked Paprika: This provides the intense red-orange hue and the characteristic “Flay” smokiness that defines the dish. It toasts in the fat, deepening in color to a rich umber.
2 tsp (10g) Cracked Black Pepper: Large granules are preferred over fine powder to provide a jagged, peppery bite that stands out against the smooth fat.
1 tsp (6g) Flaky Sea Salt (plus more for finishing): We use Maldon or similar flaky salt to draw out moisture during the “dry brine” phase and to add a final crunch before serving.
The Rendering & Finishing Agents
1 tbsp (15ml) High-Smoke Point Oil (Avocado or Grapeseed): While the chicken provides its own fat, a small amount of neutral oil helps initiate the rendering process without burning. It acts as the heat transfer medium between the iron and the skin.
1 Whole Lemon, halved: One half is squeezed for acidity, while the other is sliced into wedges and charred in the pan to create those caramelized, dark edges seen in the visual prompt.
1/4 cup (10g) Fresh Flat-Leaf Parsley: Chopped roughly, this adds the “emerald-green” scatter that provides a necessary visual and flavor contrast to the heavy spices.
Precision Tools for the Ultimate Sear
You cannot achieve the results of Bobby Flay’s Chicken Thighs with a thin, non-stick pan. You need a vessel that can hold and distribute intense heat. A 10-inch (25cm) seasoned cast iron skillet is the gold standard here. Its porous surface and heavy weight allow for a constant, even temperature that “shatters” the collagen in the skin.
Additionally, a set of heavy-duty stainless steel tongs is required for precise movement. You want to be able to press the chicken down slightly to ensure maximum skin-to-metal contact. A digital meat thermometer is also recommended to ensure the internal temperature hits 165°F (74°C) without overcooking the meat.
Step-By-Step: Mastering the Pan-Searing Forensic Process
The Pre-Game: Skin Preparation and Dry Brining
Start by patting the chicken thighs extremely dry with paper towels. Moisture is the enemy of the shattered skin. If the skin is wet, it will steam rather than fry. Once dry, combine your smoked paprika, cracked black pepper, and half of the sea salt in a small bowl.
Aggressively coat the skin side of the thighs with the rub. You want a “heavily dusted” appearance, where the red-orange spices are visible in the jagged crevices of the skin. Let the chicken sit at room temperature for 15 minutes. This allows the salt to penetrate the meat while the skin air-dries further.
The Cold-Start Rendering Technique
Place your cast iron skillet over medium-low heat and add the neutral oil. Place the chicken thighs skin-side down into the *cool* pan. This Bobby Flay-inspired technique allows the fat to render slowly as the pan heats up, preventing the skin from shrinking too quickly or burning before the fat has liquefied.
As the pan begins to hiss and sizzle, you will see small pools of shimmering, golden rendered fat begin to collect. Do not move the chicken. Listen for a consistent, rhythmic sizzle—this is the sound of moisture escaping and skin crisping. If it sounds like a violent pop, turn the heat down slightly.
Achieving the Shattered, Bubbly Texture
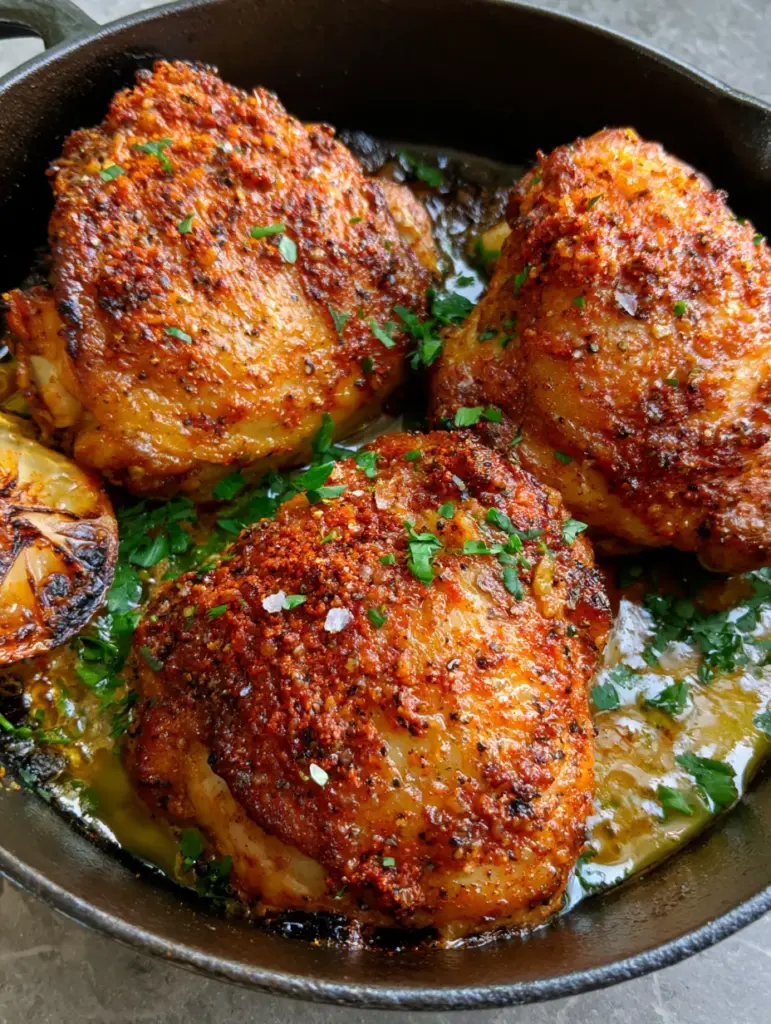
After about 12-15 minutes of skin-side rendering, the skin should transition from soft to a “visibly shattered and bubbly” state. Use your tongs to peek underneath. You are looking for an intense golden-umber color. The skin should feel like a hard shell when tapped with the tongs.
Once that “glass-like crunch” is achieved, flip the thighs. Increase the heat to medium. At this point, tuck your lemon wedges into the empty spaces of the skillet. The lemons will sit in the rendered chicken fat, caramelizing their cut sides until they are dark and charred.
The Final Finish and Resting
Cook the underside for another 5-8 minutes until the internal temperature reaches 165°F (74°C). During the last two minutes, the lemon wedges should be deeply caramelized. Remove the skillet from the heat. The residual heat of the cast iron will keep the “golden fat” sizzling around the base of the chicken.
Transfer the chicken to a neutral grey stone surface or a warm plate. Let it rest for 5 minutes. This is crucial; resting allows the juices to redistribute so they don’t gush out when you take your first bite, which would soften that hard-earned crispy skin.
Expert Tips for Success with Bobby Flay’s Chicken Thighs
- The Weight Trick: If your chicken thighs are curling, place a second smaller skillet or a foil-wrapped brick on top of them for the first 5 minutes. This ensures the entire surface area of the skin makes contact with the heat.
- Don’t Crowd the Pan: For this recipe, we specify three thighs. If you crowd the pan with six, the moisture released will steam the chicken, and you will lose that “shattered” texture. Cook in batches if necessary.
- The Fat Filter: If you find there is too much fat in the pan (more than a 1/4 inch), carefully spoon some out. You want the chicken to sit in the fat, not be submerged in it.
- Sourcing the Paprika: Use high-quality pimentón (Spanish smoked paprika). The depth of flavor is significantly higher than the generic “paprika” found in the baking aisle.
The Art of the Side Dish: What to Serve
Because Bobby Flay’s Chicken Thighs are rich and smoky, you want sides that offer either a crisp texture or a refreshing acidic bite. A vermicelli noodle salad provides a light, cool contrast to the hot, fatty chicken. If you want to lean into the crunch, these crispy potato bites are the perfect companion for soaking up that extra rendered fat.
For a complete meal that feels like a summer cookout, consider serving the chicken alongside some dill pickle chips. The vinegar in the pickles acts as a palate cleanser between bites of the smoky, umber-crusted skin. If you’re looking for a more “one-pan” vibe, you can apply similar searing techniques to a one-pan balsamic chicken for a different flavor profile on another night.
Storage, Reheating, and the “Crunch” Factor
Storage: Store leftovers in an airtight container for up to 3 days. However, be aware that the refrigerator’s humidity will soften the “shattered” skin.
Reheating: To restore the crunch, do not use a microwave. Place the chicken thighs back in a dry cast iron skillet over medium heat, skin-side down, for 5-6 minutes. Alternatively, use an air fryer at 375°F (190°C) for 4 minutes.
Freezing: You can freeze the cooked thighs for up to 2 months. Thaw overnight in the fridge before using the skillet reheating method described above.
Frequently Asked Questions
While you can, bone-in thighs are highly recommended. The bone acts as an insulator, allowing you to sear the skin for a longer period to reach that shattered state without overcooking the meat inside.
By using a medium-low heat during the rendering phase, the spices toast and deepen in flavor without burning. Avoid high heat, which can turn the paprika bitter.
The secret is the ‘cold-start’ method and moisture control. By starting with a cold pan and patting the skin bone-dry, you allow the fat to render slowly, which fries the skin into a bubbly, jagged texture rather than just browning it.
Never use a microwave. Reheat in a dry skillet skin-side down or in an air fryer to pull the moisture back out of the skin and restore that shattered texture.
Smoked paprika (pimentón) provides the signature deep red-orange color and a complex, wood-fired flavor profile that regular paprika lacks. It is a hallmark of Bobby Flay’s bold cooking style.
The Ultimate Bobby Flay’s Chicken Thighs Recipe
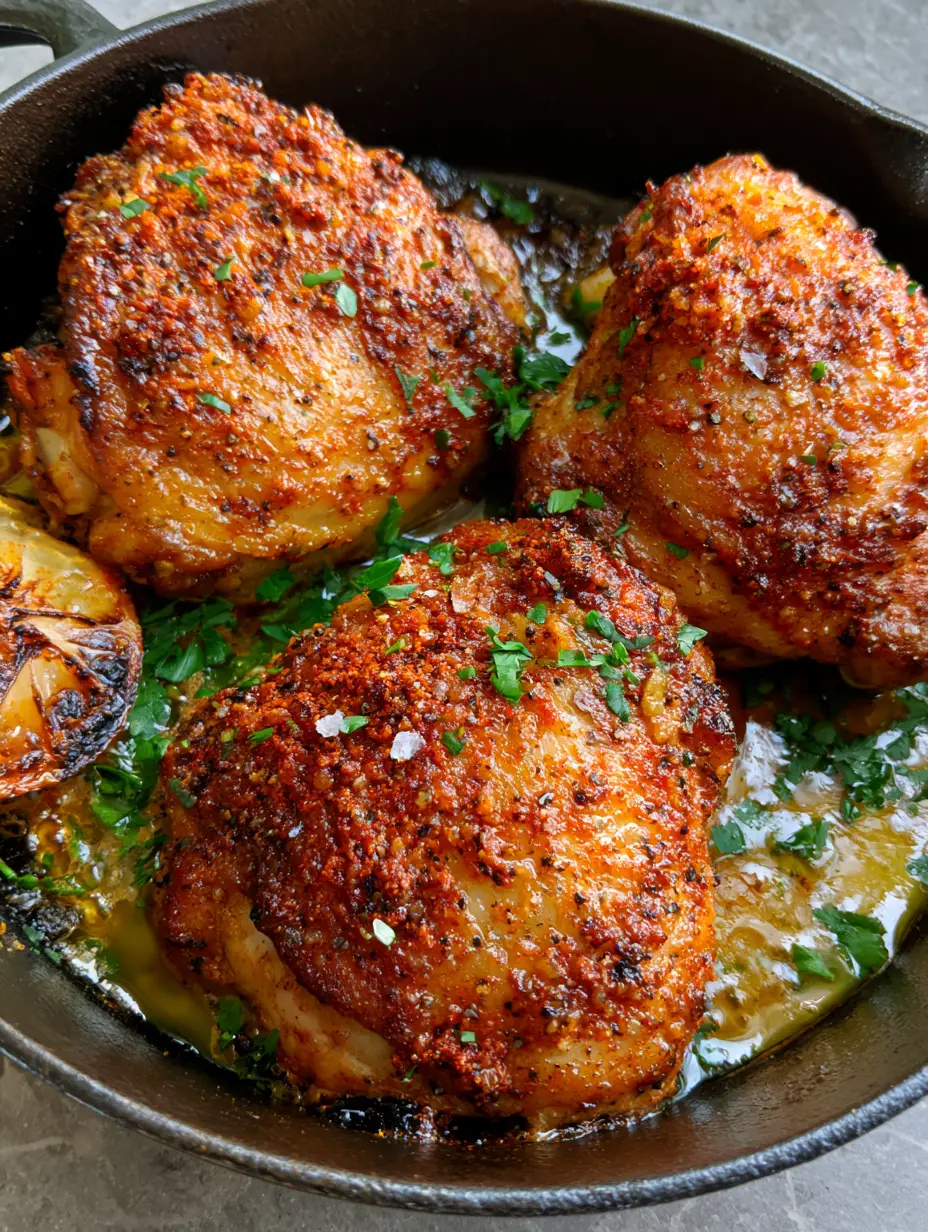
Bobby Flay's Chicken Thighs with Shattered Crispy Skin
Ingredients
Equipment
Method
- Pat the chicken thighs extremely dry. Combine smoked paprika, black pepper, and salt. Dust the skin-side of the thighs heavily with the spice rub.
- Allow the chicken to rest at room temperature for 15 minutes to allow the salt to penetrate and the skin to air-dry further.
- Add oil to a cold cast iron skillet. Place chicken skin-side down. Turn heat to medium-low. Allow fat to render slowly for 12-15 minutes until skin is bubbly and shattered.
- Flip the thighs. Add lemon wedges to the pan. Increase heat to medium and cook for 5-8 minutes until meat reaches 165°F (74°C).
- Remove from heat. Scatter fresh parsley and extra flaky salt over the chicken. Let rest for 5 minutes before serving.
Notes
Use high-quality smoked paprika for the best color and flavor depth.

Closing Thoughts: Join the Gloss Gourmet Community
Mastering Bobby Flay’s Chicken Thighs is a rite of passage for any cook who values texture and bold seasoning. The combination of that “shattered” bubbly skin and the deep, smoky paprika rub creates a sensory experience that is hard to beat. We hope this forensic look at the searing process helps you achieve that perfect golden-umber finish every single time.
If you loved this recipe, please leave a comment below and tell us how your skin turned out! Don’t forget to follow us on Pinterest for more visually stunning recipe blueprints. Share your creations by tagging @gloss_gourmet—we love seeing your cast iron masterpieces!