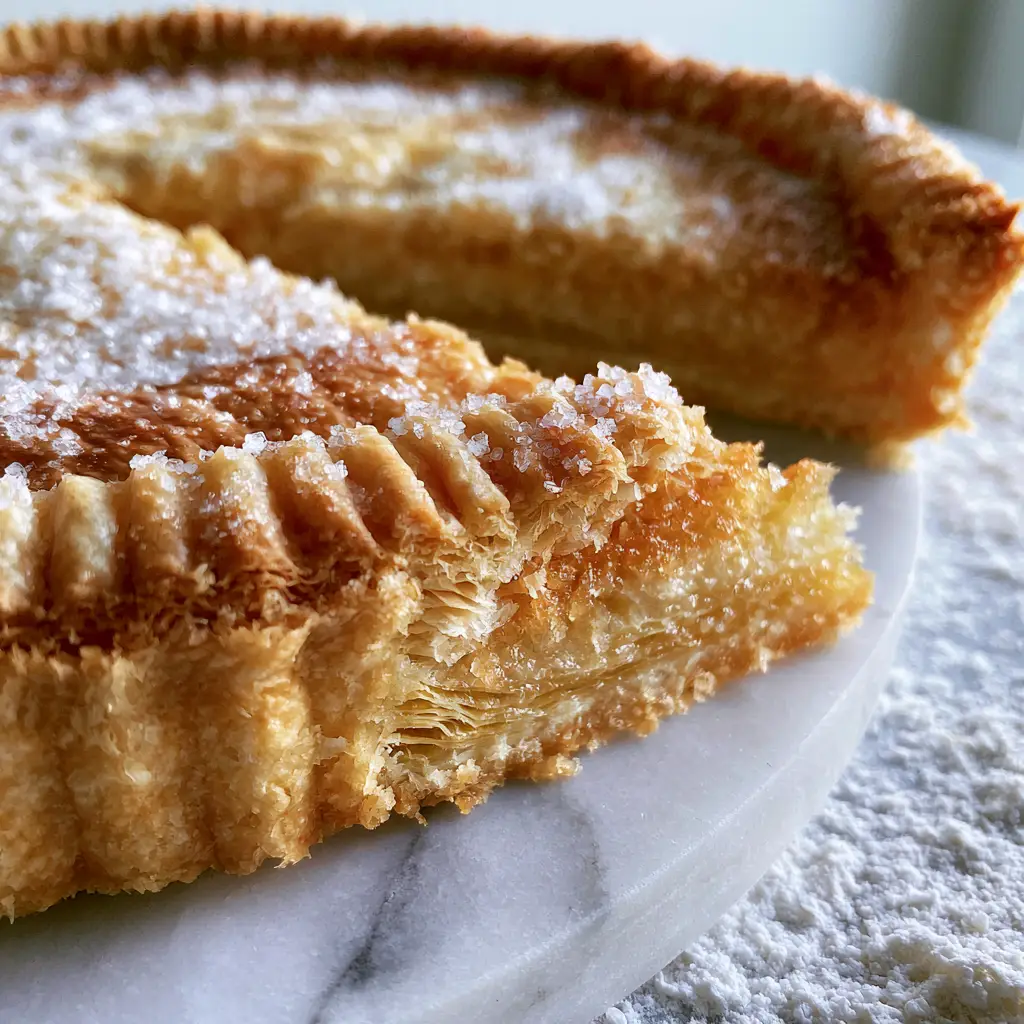
Classic pie recipes are the heartbeat of home baking, but achieving that elusive, bakery-style shatteringly flaky crust can feel like a professional secret. Whether you are prepping a sweet fruit filling or a savory masterpiece, the foundation of every legendary bake starts with a perfectly golden-brown dough. This recipe delivers thin, buttery layers that practically melt in your mouth, featuring a beautifully crimped scalloped edge and a signature crunch from coarse sugar crystals.
Why These Classic Pie Recipes Always Win on Pinterest
- Visual Perfection: That deep golden-brown baked pie dough is the ultimate scroll-stopper.
- Multi-Layered Texture: We use a specific folding technique to create visible, thin buttery layers.
- No Soggy Bottoms: Our method ensures a perfectly crisp, dry pastry base that holds up to any filling.
- The Scalloped Edge: A beautifully crimped edge provides that “handheld smartphone photo” aesthetic that Pinterest users love.
- Crunch Factor: A light dusting of coarse sugar crystals adds both sparkle and essential texture.
The Secret Pantry Staples for Gold-Standard Pastry
To master classic pie recipes, you need more than just flour and water; you need precision and the right temperature. Every ingredient here serves a scientific purpose to ensure your crust is both tender and structurally sound.
All-Purpose Flour: 2 ½ cups (315g). This provides the structural framework. We recommend a light flour dusting on your marble surface to prevent sticking without toughening the dough.
High-Fat Unsalted Butter: 1 cup (225g), chilled and cubed. Cold butter is non-negotiable. As it melts in the oven, it creates steam, which pushes the layers of dough apart to create that flaky pastry effect.
Granulated Sugar: 1 tablespoon (12g). A hint of sweetness helps with the browning process, giving us that rich, golden-brown hue.
Fine Sea Salt: 1 teaspoon (6g). Salt is the ultimate flavor enhancer; without it, even the best classic pie recipes will taste flat.
Ice Cold Water: ¼ to ½ cup (60ml to 120ml). Use only as much as needed to bring the dough together. Excess moisture leads to gluten development, which makes the crust tough instead of tender.
Coarse Sugar Crystals (Turbinado): 1 tablespoon (12g). This is for the finish. It creates that professional, glistening look on the crimped scalloped edge.
How to Create the Ultimate Flaky Foundation
Success with classic pie recipes lies in the “rubbing-in” method and maintaining the cold chain. If your butter starts to melt, your layers will disappear!
Step 1: The Flour and Butter Fusion
In a large chilled bowl, whisk together your flour, sugar, and salt. Add your cubes of ice-cold butter. Using a pastry cutter or your fingertips, work the butter into the flour until the mixture resembles coarse meal with some pea-sized chunks of butter remaining.
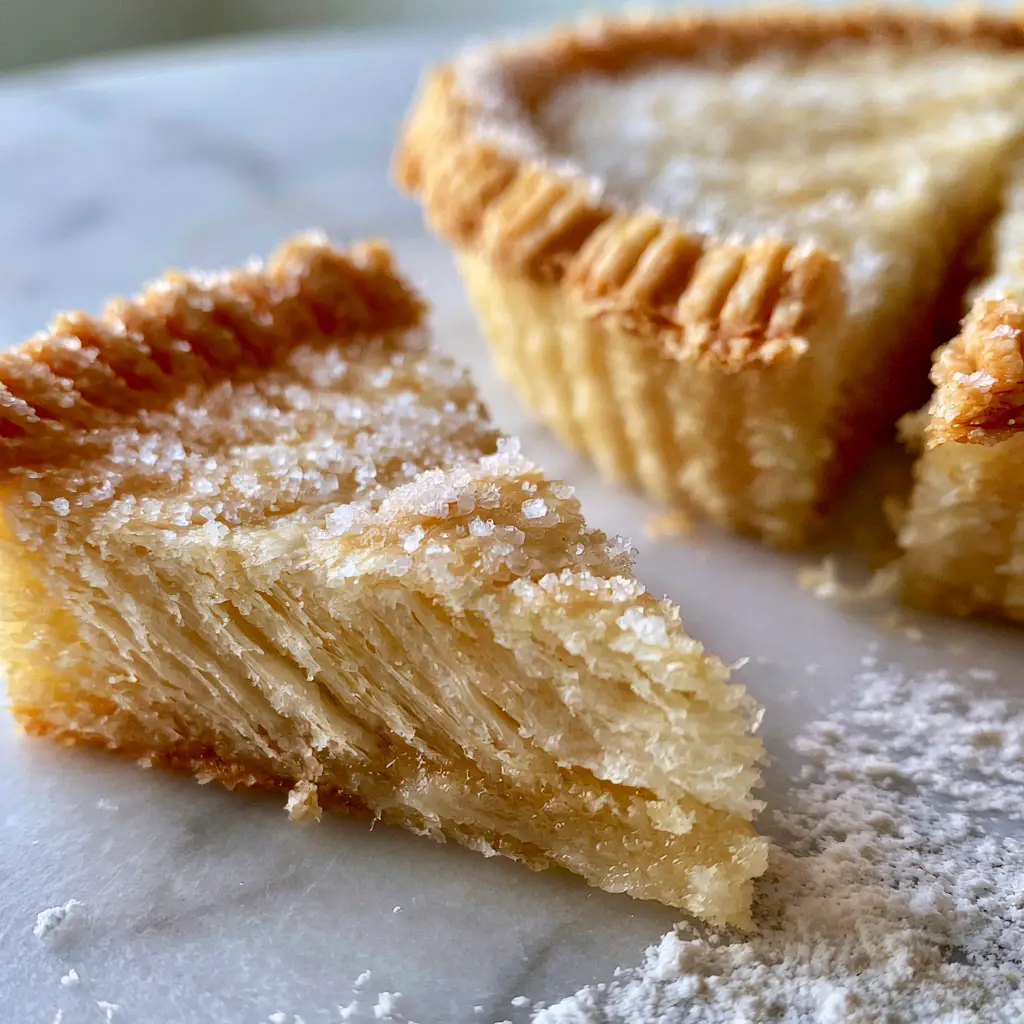
Visual Cue: You should still see visible streaks of yellow butter—this is what creates those thin, buttery layers later!
Step 2: Hydration and The Squeeze Test
Drizzle the ice water over the mixture, one tablespoon at a time. Toss with a fork until the dough begins to form large clumps. Perform the “Squeeze Test”: if you grab a handful of dough and it holds together without crumbling, you’ve used enough water.
For more inspiration on how to use this dough, check out these Grandma's best pie recipes for traditional filling ideas.
Step 3: Lamination for Multi-Layered Flakiness
Turn the dough onto a marble surface with a light flour dusting. Instead of kneading, gently fold the dough over itself 3-4 times. This process, called “rough lamination,” stacks the butter sheets, ensuring a crisp dry pastry base that won’t get soggy under heavy fillings.
Step 4: The Chilling Protocol
Divide the dough into two discs. Wrap them tightly in plastic wrap and refrigerate for at least 2 hours, or ideally overnight. This allows the gluten to relax and the flour to fully hydrate, preventing the crust from shrinking in the oven.
Sculpting the Perfect Crimped Scalloped Edge
Once your dough has chilled, roll it out into a 12-inch circle. Drape it over your pie dish. To get that iconic look found in classic pie recipes, trim the overhang to about 1 inch. Fold the edge under itself so it rests on the rim of the plate.
The Technique: Use the thumb and index finger of one hand and the index finger of the other to “pinch” the dough into a scalloped pattern. This provides a thick, sturdy border that holds the coarse sugar crystals beautifully.
If you’re looking for a savory twist on this crust, you have to try this Spicy Brisket Jalapeño Pie which uses the same flaky technique with a kick!
Baking for Global-Class Color and Texture
Preheat your oven to 400°F (200°C). Brush the edges of your crust with a light egg wash (1 egg beaten with 1 teaspoon of water). Sprinkle the coarse sugar crystals generously over the crimped edge.
Bake until the dough is a deep, golden-brown. If the edges brown too quickly, cover them with a pie shield or aluminum foil. A long, slow bake is the secret to a perfectly crisp, dry, non-soggy golden bottom foundation.
Expert Tips for Success
- Keep it Cold: If the dough feels soft at any point, pop it back in the freezer for 10 minutes. Cold fat equals flaky layers.
- Don’t Overwork: The more you touch the dough, the more gluten develops. Handle it as little as possible.
- Use a Marble Surface: Marble stays naturally cool, which is perfect for working with all-butter classic pie recipes.
- The Sugar Secret: Don’t skip the turbinado sugar! It adds a professional finish that Pinterest users adore.
Storage, Reheating & Freezing
Storage: Unbaked dough keeps in the fridge for 3 days. Baked crusts can stay at room temperature for 2 days if covered loosely.
Freezing: This is one of the best classic pie recipes for meal prep. Freeze dough discs for up to 3 months. Thaw in the fridge overnight before rolling.
Reheating: To crisp up a day-old pie, place it in a 350°F (175°C) oven for 10 minutes to revive that crisp dry pastry base.
What to Serve With This
A flaky crust is the perfect partner for many dishes. While it’s the star of Chocolate Cream Cheese Danish inspired bakes, it also pairs beautifully as a side to a hearty Pasta Fagioli Soup for a comforting winter meal. For a sweet treat, serve a slice of pie alongside these Brown Butter Sourdough Discard Chocolate Chip Cookies.
Frequently Asked Questions
Yes! While butter provides the best flavor, shortening has a higher melting point which helps the crimped scalloped edge hold its shape better during baking.
While not strictly required, a marble surface stays cold, preventing the butter in the dough from melting while you roll it, which is essential for multi-layered flakiness.
To ensure a crisp base, bake your pie on the lowest oven rack and consider blind baking the crust before adding wet fillings. This sets the pastry before moisture can soak in.
Coarse sugar crystals add a delightful crunch and a professional ‘bakery-style’ sparkle to the rim of the pie, enhancing the visual appeal for Pinterest-worthy photos.
Tough crust is usually caused by overworking the dough or adding too much water, both of which develop excess gluten. Handle the dough minimally and keep your butter ice-cold.
The Ultimate Golden-Brown Flaky Pie Crust Recipe
Classic pie recipes: The Secret to an Ultra-Flaky, Golden-Brown All-Butter Crust
Ingredients
Equipment
Method
- Whisk flour, sugar, and salt in a chilled bowl.
- Add cold butter cubes and use a pastry cutter until pea-sized lumps remain.
- Add ice water 1 tablespoon at a time until the dough passes the squeeze test.
- Turn dough onto a floured marble surface and fold 3-4 times to create layers.
- Wrap into discs and refrigerate for at least 2 hours.
- Roll out, place in dish, and create a scalloped edge with your fingers.
- Brush with egg wash, sprinkle sugar crystals, and bake at 400°F until golden-brown.
Notes
Use a glass pie plate to easily check if the bottom is golden-brown.
Join the Gloss Gourmet Community!
Did you master these classic pie recipes? We want to see your golden-brown baked pie dough! Save this recipe to your “Baking Obsession” board on Pinterest and follow gloss_gourmet for more elite culinary secrets. If you made this, please share a photo of your flaky layers in the comments and leave a 5-star rating below!