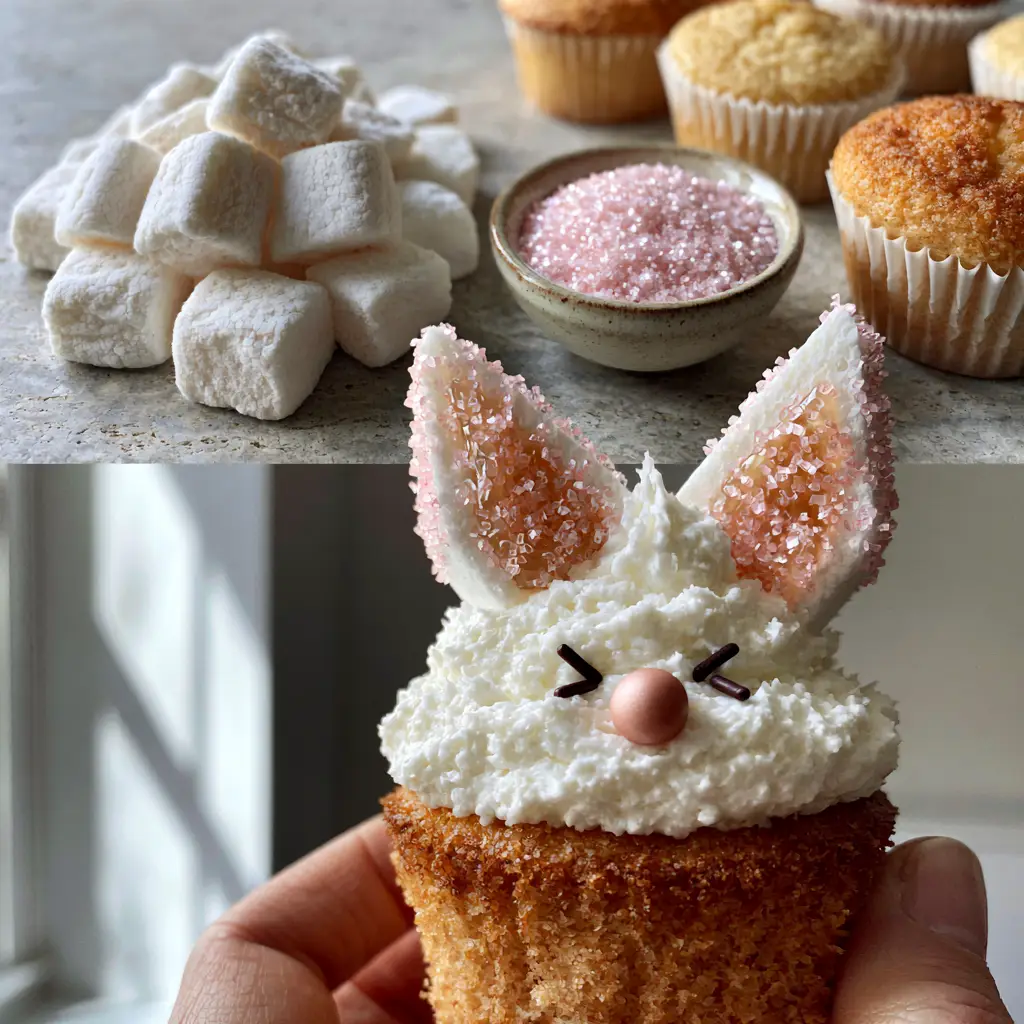
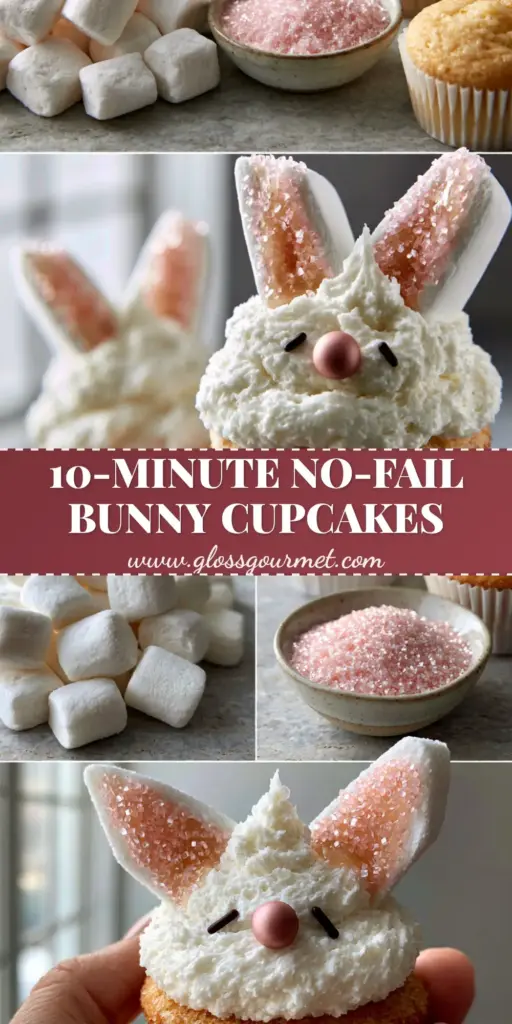
Bunny Cupcakes are the quintessential springtime dessert that brings a touch of whimsy to any Easter celebration or garden party. These adorable treats feature a soft, golden-brown vanilla cupcake base topped with a snowy mountain of whipped white buttercream frosting. The magic, however, lies in the details: diagonal-cut marshmallow ears coated in shimmering pink sanding sugar, finished with dark chocolate jimmy eyes and a matte pink pearl candy nose. Whether you are a seasoned baker or looking for a fun family project, these cupcakes are designed to impress both visually and deliciously.
Why These Adorable Easter Bunny Cupcakes Work
- Ultra-Realistic Textures: The contrast between the fluffy cake crumb, the creamy frosting, and the sparkling sugar crystals creates a professional bakery aesthetic.
- Simple Decorating Technique: You don’t need advanced piping skills to create these cute bunny faces; the marshmallow ears do all the heavy lifting.
- Perfect for Scrapers & Social Media: The high-contrast colors of the pink sanding sugar against the white buttercream make these highly clickable on Pinterest.
- Crowd-Pleasing Flavor: A classic vanilla profile ensures that these Bunny Cupcakes are loved by kids and adults alike, much like my popular red velvet cinnamon rolls.
Essential Ingredients for Fluffy Vanilla Cupcakes
To achieve the perfect Bunny Cupcakes, we need a base that is sturdy enough to hold the marshmallow ears but soft enough to melt in your mouth. Here is what you will need:
The Cupcake Base
- 1 ½ cups (190g) All-Purpose Flour: Provides the structure for our cupcakes.
- 1 cup (200g) Granulated Sugar: For sweetness and a tender crumb.
- 1 ½ tsp (6g) Baking Powder: The leavening agent that ensures a golden-brown lift.
- ½ tsp (3g) Salt: To balance the sweetness of the buttercream.
- ½ cup (115g) Unsalted Butter: Softened to room temperature for a rich, buttery flavor.
- 1 large Egg: Provides binding and moisture.
- ¾ cup (180ml) Whole Milk: Adds fat for a creamy mouthfeel.
- 2 tsp (10ml) Vanilla Extract: Use high-quality extract for that signature bakery scent.
The Snowy Buttercream & Decorations
- 1 cup (225g) Unsalted Butter: Must be softened to create a whipped mountain of frosting.
- 3-4 cups (375g-500g) Powdered Sugar: Sifted to ensure a smooth, grit-free texture.
- 2 tbsp (30ml) Heavy Cream: To adjust the consistency for easy piping.
- 12 Large Marshmallows: These will be cut to form the iconic bunny ears.
- ½ cup (100g) Pink Sanding Sugar: To give the ears a shimmering pink coating.
- 24 Dark Chocolate Jimmies: The perfect scale for tiny bunny eyes.
- 12 Pink Pearl Candies: For a matte pink nose that pops against the white frosting.
Step-by-Step Instructions for Perfect Bunny Cupcakes
1. Bake the Golden Vanilla Base
Preheat your oven to 350°F (175°C) and line a muffin tin with white paper liners. In a large bowl, cream the softened butter and sugar until light and fluffy. Beat in the egg and vanilla extract. Gradually add the dry ingredients, alternating with the milk, until just combined. Divide the batter evenly and bake for 18-22 minutes. You are looking for a golden-brown vanilla cupcake that springs back when touched.
2. Whip the Snowy White Buttercream
In a stand mixer, beat the softened butter for 5 minutes until it turns almost white. Gradually add the powdered sugar and heavy cream. Continue whipping until you have a thick, whipped mountain of snowy white buttercream frosting. If you enjoy rich textures, this frosting is as satisfying as the filling in my berries and cream stuffed French toast casserole.
3. Create the Shimmering Marshmallow Ears
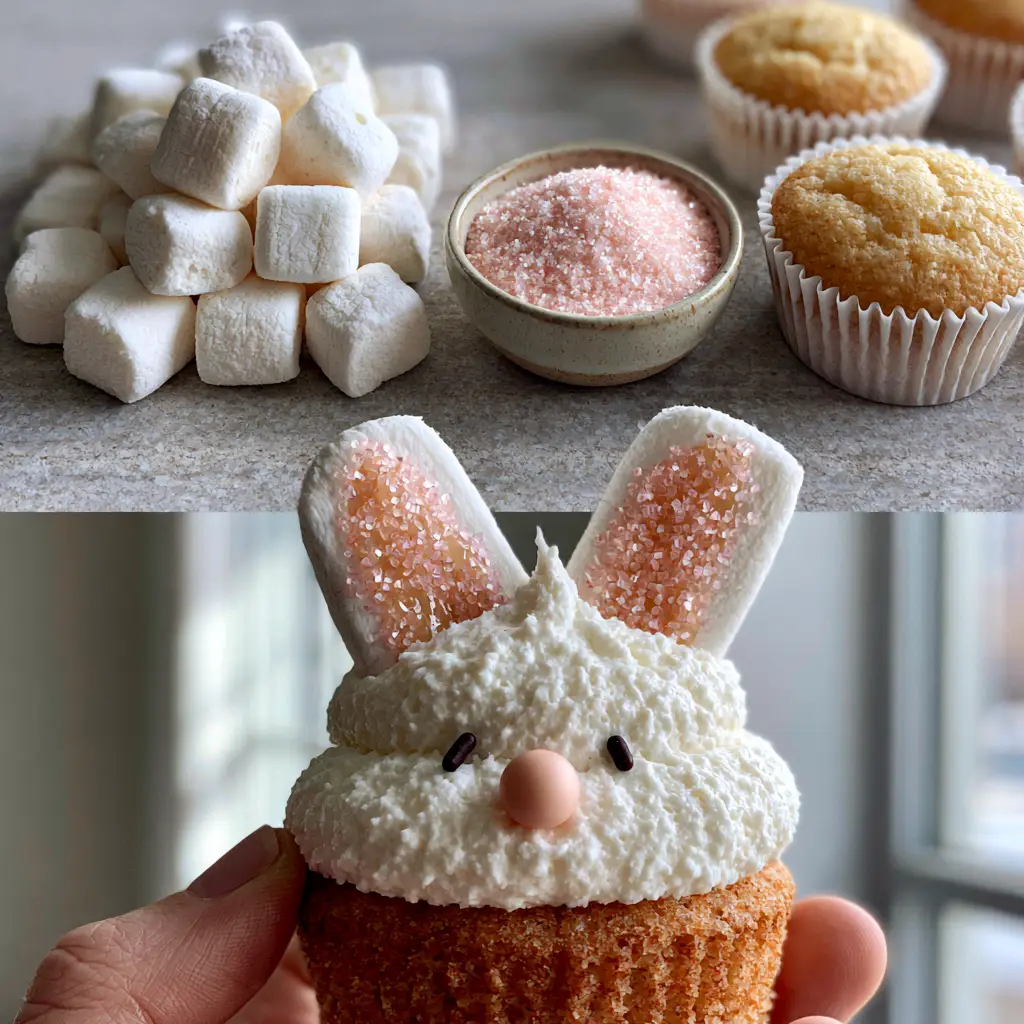
This is the most critical visual step. Take a large marshmallow and, using clean kitchen shears, cut it diagonally from one corner to the opposite side. This will reveal a sticky center. Immediately press the sticky side into a bowl of pink sanding sugar. The sugar crystals will adhere to the center, creating a beautiful sparkling pink inner ear.
4. Assemble the Bunny Face
Pipe a generous mound of frosting onto each cooled cupcake. Place two marshmallow ears on top, pressing gently so they stand upright. Just below the ears, place two dark chocolate jimmies for the eyes. Finally, add one pink candy pearl in the center for the nose. The macro textures of the sugar grains and cake crumb should be visible and inviting.
Expert Tips for Success
- Room Temperature Ingredients: Ensure your butter and eggs are at room temp to prevent the batter from curdling, ensuring a minimalist aesthetic with a smooth finish.
- The Sticky Secret: If your marshmallows aren’t sticky enough after cutting, a tiny drop of water or corn syrup will help the pink sanding sugar stick perfectly.
- Frosting Height: Use a large round piping tip to create a “mountain” effect, which gives the ears enough support to stay upright.
- Storage Hint: If you are serving these after a hearty meal like creamy baked macaroni and cheese, keep them in a cool spot so the buttercream holds its shape.
Storage, Reheating & Freezing
Store your Bunny Cupcakes in an airtight container at room temperature for up to 2 days. For longer storage, refrigerate them for up to 5 days, but let them come to room temperature before serving to soften the buttercream. You can freeze the un-frosted cupcakes for up to 3 months; simply thaw and decorate fresh for the best shimmering pink results.
What to Serve With Bunny Cupcakes
These cupcakes are the perfect sweet finish to a festive brunch. Pair them with a savory main like a breakfast-egg-casserole or a light spring salad. They also look stunning on a dessert table alongside other seasonal treats like pastel macarons or lemon bars.
Frequently Asked Questions
Yes! You can bake the cupcakes 24 hours in advance. For the best look, add the marshmallow ears and candy face just before serving so the sugar stays sparkling and the marshmallows don’t dry out.
A large round tip (like Wilton 1A) or even just cutting the corner off a piping bag works great. You want a thick, smooth mound to support the weight of the marshmallow ears.
The key is the ‘sticky center’ exposed after cutting the marshmallow diagonally. If it’s not sticky enough, a tiny dab of light corn syrup or water will ensure the pink sanding sugar adheres perfectly.
If you don’t have jimmies, you can use mini chocolate chips (pointy side down) or even a small dot of black decorating gel to create the bunny eyes.
The Ultimate Bunny Cupcakes Recipe
Bunny Cupcakes: Easy Vanilla Easter Treats with Marshmallow Ears
Ingredients
Equipment
Method
- Preheat oven to 350°F (175°C) and line a muffin tin with white liners.
- Cream butter and sugar until fluffy. Add egg and vanilla. Mix in dry ingredients alternating with milk until smooth.
- Fill liners 2/3 full and bake for 18-22 minutes until golden-brown. Cool completely.
- Whip softened butter, powdered sugar, and cream until a snowy white mountain texture forms.
- Cut marshmallows diagonally. Press sticky side into pink sanding sugar until shimmering.
- Pipe frosting, attach ears, and add dark chocolate jimmies for eyes and a pink pearl for the nose.
Notes
Make sure cupcakes are 100% cool before frosting or the 'ears' will slide off.
Join the Gloss Gourmet Community!
If you loved making these Bunny Cupcakes, please save this recipe to your favorite Easter Desserts board on Pinterest! We would love to see your creations—post a photo of your cupcakes in the comments below. Don’t forget to follow @gloss_gourmet for more high-aesthetic recipes and leave a 5-star rating if these bunnies hopped right into your heart!