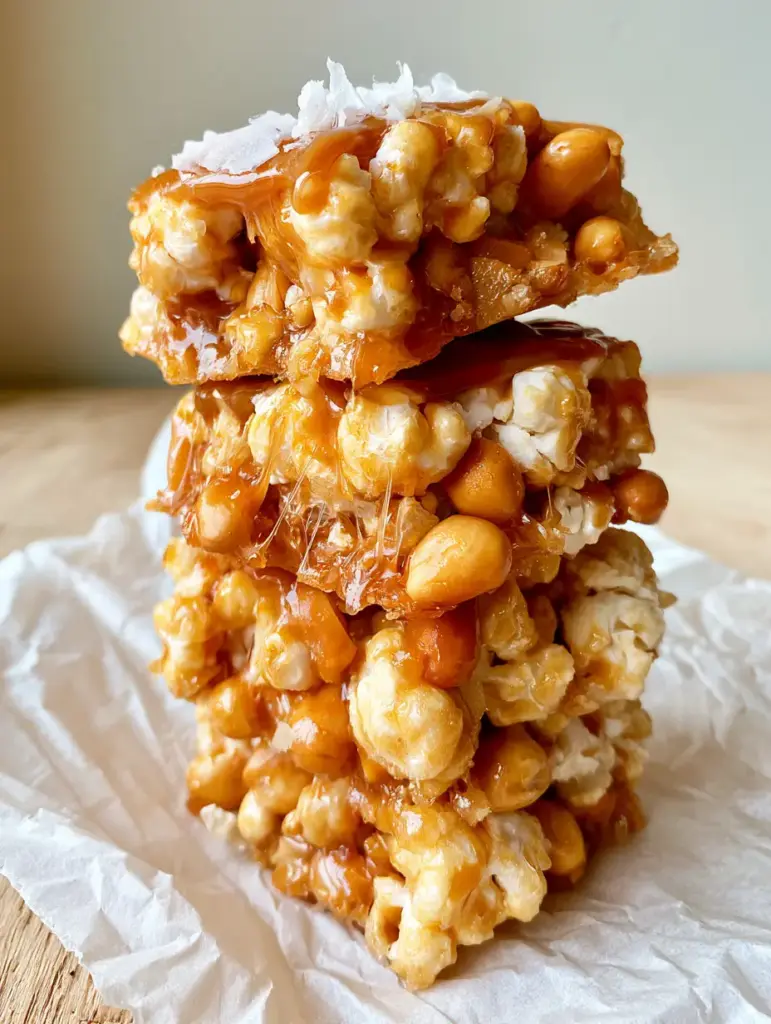
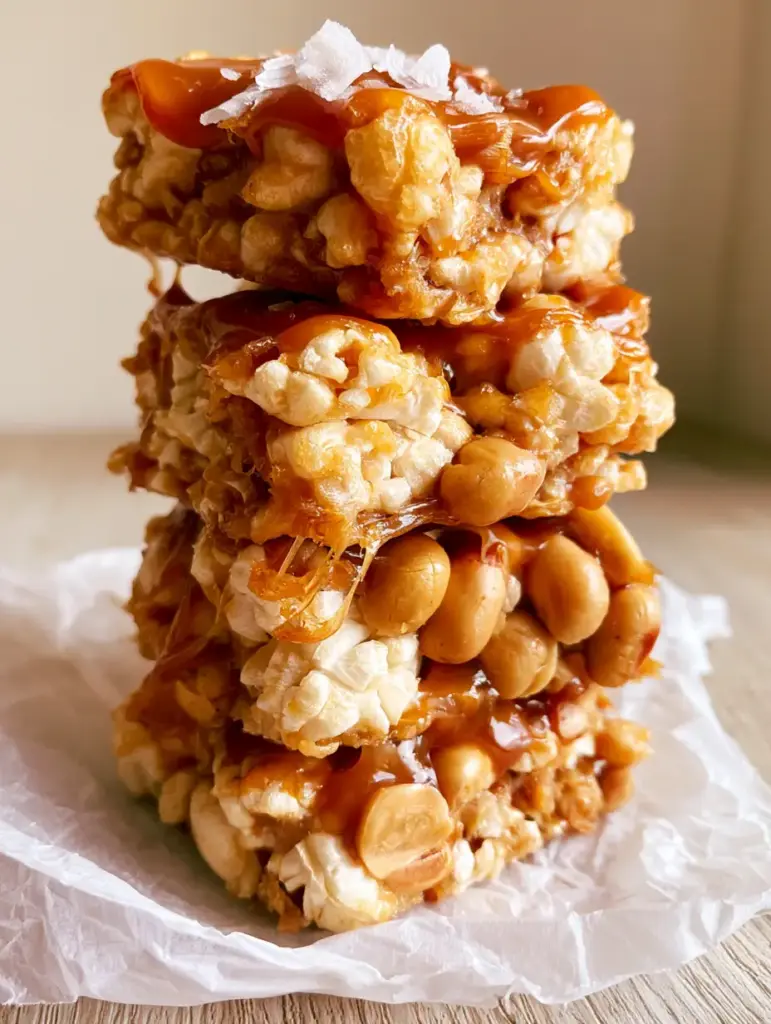
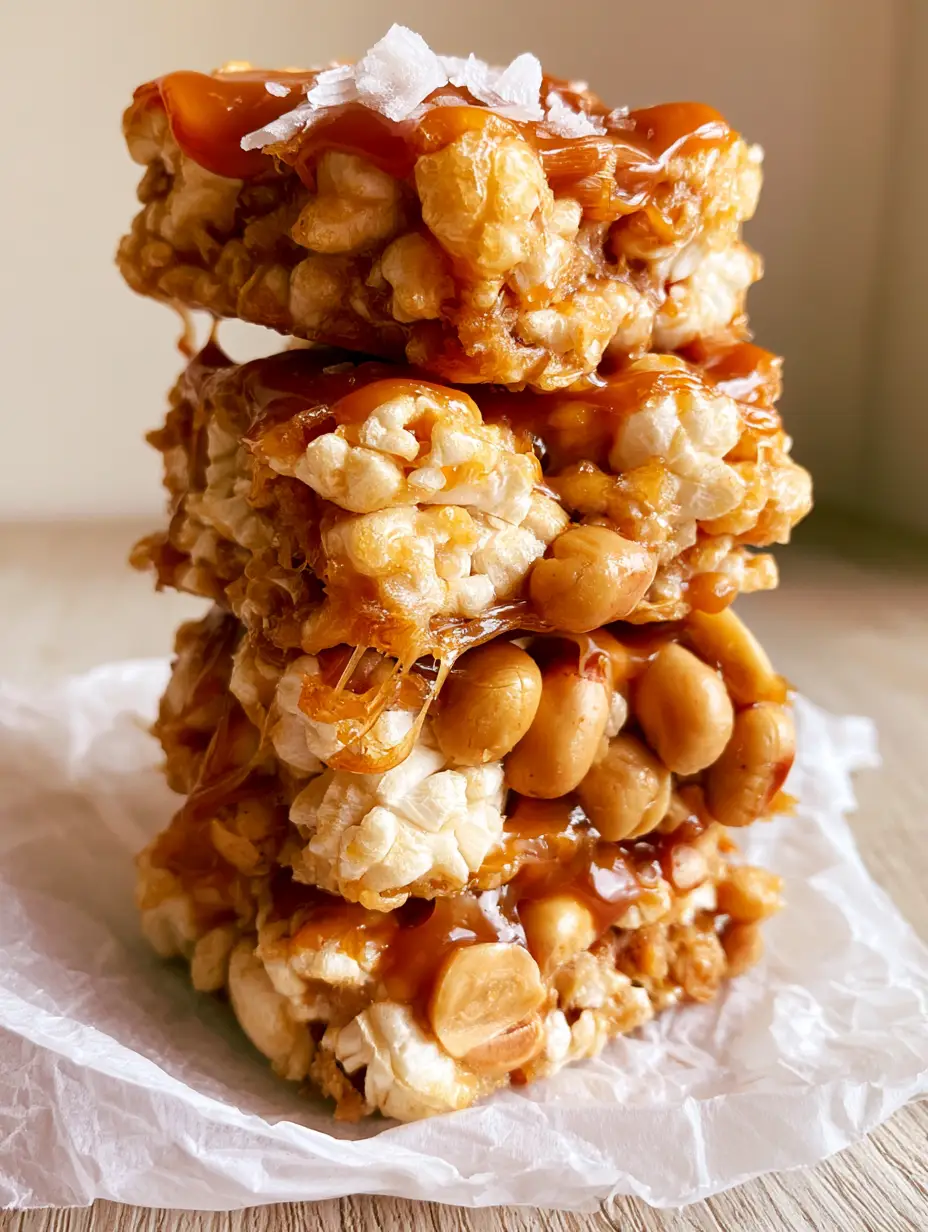
There is a specific kind of magic found in the combination of deep, nutty caramel and airy, crisp popcorn. This Cracker Jill bars recipe takes that nostalgia and transforms it into a thick, gooey, and sophisticated dessert bar that rivals any professional confectionary. Imagine a tall stack of thick clusters, held together by a glistening amber glaze that creates those iconic, sticky sugar-pulls as you pull a piece away.
Every bite of these bars offers a symphony of textures: the soft crunch of perfectly puffed popcorn, the dense snap of whole roasted salted peanuts, and the chewy luxury of a marshmallow-infused caramel binder. Whether you are prepping for a game day snack or a gourmet gift, these bars are designed to impress both the eyes and the palate.
We have meticulously engineered this recipe to ensure it matches the high-end food styling of professional photography. By using a double-glaze technique—once for the binder and once for the finishing drizzle—you achieve that crystalline, macro-ready sparkle that makes these bars look as good as they taste.
Why This Gooey Popcorn Bar Hits Every Sensory Note
- The Perfect Sugar-Pull: By combining traditional caramel with a marshmallow binder, we achieve a flexible, sticky texture that prevents the bars from becoming rock-hard.
- Visual Glisten: A secondary amber glaze is drizzled over the top to catch the light, highlighting the crystalline texture of the Maldon sea salt flakes.
- Structural Integrity: These bars are thick and handheld, thanks to a specific compression technique that keeps the airy popcorn clusters intact without crushing them.
- Forensic Flavor Balance: The heavy use of whole roasted salted peanuts cuts through the golden caramel, ensuring the bars aren’t cloyingly sweet.
The Anatomy of an Elite Cracker Jill Bars Recipe
Puffed Popcorn Clusters (10 Cups / 80g): You must use freshly popped corn, preferably air-popped or stovetop, to ensure there are no unpopped kernels. The popcorn provides the airy volume and the “puffed” visual core of the recipe.
Whole Roasted Salted Peanuts (1.5 Cups / 225g): Do not use chopped peanuts; the whole nut is essential for the rustic, high-end aesthetic described in our visual blueprint. The salt on the nuts is a foundational seasoning for the caramel.
Unsalted European-Style Butter (1/2 cup / 115g): Higher fat content in the butter leads to a smoother, more glistening amber glaze. It provides the richness that balances the sugars.
Light Brown Sugar (1 cup / 200g): Brown sugar provides the molasses notes required for that deep, golden-amber color. It creates the base of our caramel sauce.
Light Corn Syrup (1/2 cup / 120ml): This is an “invisible” foundational ingredient. It prevents the sugar from crystallizing, ensuring your glaze remains glossy and smooth rather than grainy.
Mini Marshmallows (4 cups / 200g): These act as the primary binder. When melted into the caramel, they create the “sticky sugar-pulls” that distinguish a bar from a standard popcorn ball.
Pure Vanilla Extract (1 tsp / 5ml): Added at the very end to preserve its aromatic compounds, vanilla rounds out the flavor profile of the marshmallow binder.
Baking Soda (1/2 tsp / 3g): A culinary secret! Adding baking soda to the boiling caramel aerates the mixture, making it easier to pour and giving the glaze a lighter, more “glistening” appearance.
Maldon Sea Salt Flakes (for finishing): These large, translucent crystals provide a sharp salt hit and a beautiful visual contrast against the dark amber drizzle.
Essential Equipment for Confectionary Success
To achieve the macro-worthy results seen in our visual blueprint, you will need a large, heavy-bottomed pot to prevent the caramel from scorching. A digital candy thermometer is helpful, though we will provide sensory cues for those working by eye.
You also need a 9×9 inch (23x23cm) square baking pan lined with crumpled white parchment paper. The “crumpled” texture is not just for the photo; it creates a non-stick surface that allows you to lift the heavy, gooey stack out of the pan with ease.
A Step-by-Step Guide to the Ultimate Golden Amber Glaze
1. Preparing the Puffed Foundation
Start by popping your corn. If you are using a stovetop method, ensure you sift the popcorn through your fingers or a wide-mesh cooling rack to remove every single unpopped kernel. Place the 10 cups (80g) of popcorn into a very large, buttered heat-proof bowl along with the 1.5 cups (225g) of roasted peanuts.
Having your “inclusions” ready is vital, as caramel waits for no one. If you enjoy a variety of snacks, you might find this texture profile similar to the crunch found in our homemade chocolate chip cookies, though much airier.
2. Developing the Caramel Base
In a medium saucepan over medium heat, melt the 1/2 cup (115g) of butter. Stir in the 1 cup (200g) of light brown sugar and 1/2 cup (120ml) of corn syrup. Bring the mixture to a gentle boil, stirring constantly.
Once the mixture begins to bubble, stop stirring and let it boil for exactly 2 minutes. You are looking for a “glistening amber” color—a deep, honeyed gold that smells toasted but not burnt. This is the stage where the sugars develop their complex flavor profile.
3. The Marshmallow “Sugar-Pull” Infusion
Remove the pan from the heat immediately. Stir in the vanilla and the baking soda. The mixture will foam up—this is the aeration process that creates the crystalline texture. Quickly fold in the 4 cups (200g) of marshmallows, stirring until they are completely melted into a smooth, thick golden-amber liquid.
This “binder” is what creates the thin, sticky sugar-pulls mentioned in our visual prompt. It should look like liquid gold and feel incredibly elastic.
4. The Great Coating
Pour the hot caramel mixture over the popcorn and peanuts. Using a large, greased spatula, gently fold the mixture. You want to coat every puffed cluster without crushing the popcorn. The goal is to see the peanuts suspended within the sticky web of the binder.
Transfer the mixture to your parchment-lined pan. Press down *very lightly*. If you press too hard, you lose the “airy” quality; if you press too little, the bars won’t hold their tall stack shape. If you’ve ever made crispy cheese tots, you know that the right amount of pressure is key to structural success.
5. The Signature Amber Drizzle and Salt Finish
While the bars are setting, melt an additional tablespoon of butter with two tablespoons of brown sugar and a splash of syrup to create a thin “glistening amber glaze.” Drizzle this glossily over the top of the bars in a zig-zag pattern.
Immediately sprinkle the Maldon sea salt flakes over the wet drizzle. The salt should adhere to the caramel, looking like tiny crystals caught in amber. Let the bars set at room temperature for at least 60 minutes before slicing into thick, handheld rectangles.
Expert Tips for Visual and Textural Perfection
- Sift Your Kernels: Nothing ruins a “macro, handheld photo” faster than a stray unpopped kernel. Sift twice to be absolutely sure.
- Grease Everything: Grease your bowl, your spatula, and even your hands (with a bit of butter or oil) to handle the sticky marshmallow binder without a mess.
- The Crumpled Paper Trick: Crumple your parchment paper into a ball, then flatten it out before lining the pan. This creates a rustic texture and prevents the heavy bars from sliding.
- Avoid the Fridge: Do not set these in the refrigerator. The moisture will make the puffed popcorn clusters soft and stale. Room temperature is essential for the “crunchy and chewy interior.”
Serving Suggestions for Gourmet Snacking
These Cracker Jill bars are a showstopper on their own, but they also fit perfectly into a larger spread. If you are hosting a lunch, pair them with something light like a fresh spinach salad to balance the richness of the caramel.
For a themed “Sweet and Savory” party, serve these alongside creative avocado toast bites or even a tray of mini French dip sandwiches for a full-flavor experience. The contrast between the salty peanuts and a savory main course is unmatched.
Storage and Freshness Guide
Because popcorn is sensitive to humidity, these bars are best enjoyed within 2-3 days. Store them in an airtight container at room temperature. Place a piece of parchment paper between layers to prevent the glistening glaze from sticking together.
We do not recommend freezing this Cracker Jill bars recipe, as the thawing process will compromise the “perfectly puffed” texture of the popcorn clusters, leading to a soggy bar.
Frequently Asked Questions
Yes, but ensure it is plain or lightly salted. Avoid extra-buttery versions as the oils can prevent the amber caramel glaze from adhering properly to the puffed clusters.
The best method is to pour the popped corn onto a cooling rack with large enough holes for kernels to fall through, or manually sift the popcorn into a second bowl before adding peanuts.
The secret is the combination of a boiled brown sugar caramel and mini marshmallows. The marshmallows provide the elasticity needed for the sticky pulls seen in the visual blueprint.
You can use brown rice syrup or honey, though honey will alter the flavor profile. The syrup is essential to keep the glistening glaze smooth and prevent sugar crystallization.
Sogginess usually occurs if the popcorn was not fresh or if the bars were stored in the refrigerator. Always store them in an airtight container at room temperature.
The Ultimate Cracker Jill Bars Recipe Card
Cracker Jill Bars Recipe: The Ultimate Sweet and Salty Caramel Popcorn Treat
Ingredients
Equipment
Method
- Line a 9x9 inch pan with crumpled parchment paper and grease lightly. Place popcorn and peanuts in a large greased bowl.
- In a saucepan, melt butter, brown sugar, and corn syrup. Bring to a boil for 2 minutes until glistening and golden-amber.
- Remove from heat. Stir in vanilla and baking soda. Fold in marshmallows until completely melted and smooth.
- Pour the hot mixture over the popcorn. Gently fold to coat all clusters without crushing them.
- Press into the pan lightly. Drizzle with extra caramel and sprinkle with Maldon sea salt. Let set for 1 hour.
Notes
Do not refrigerate; store at room temperature to maintain crunch.
Closing & Call to Action
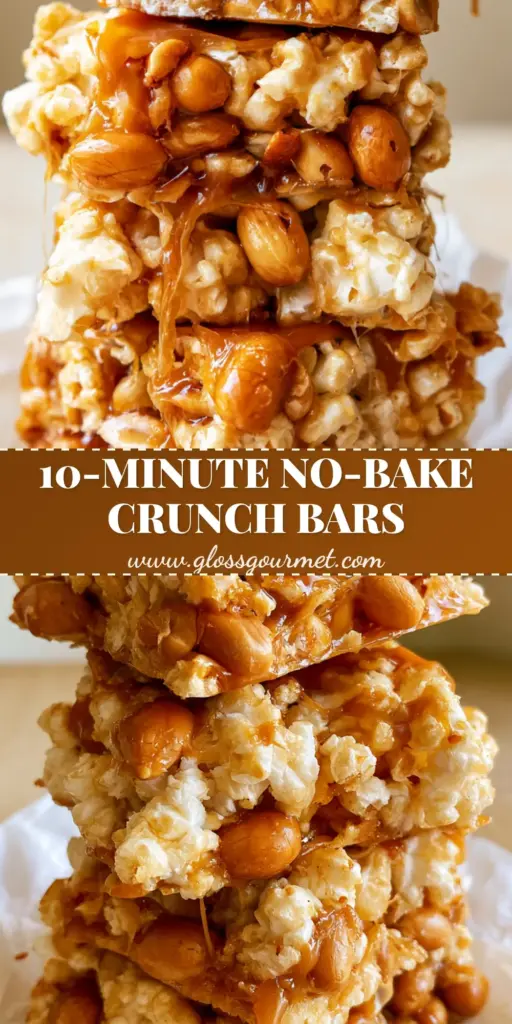
Making this Cracker Jill bars recipe is about more than just a snack; it’s about mastering the balance of sugar, salt, and texture. The result is a visually stunning, thick, and gooey treat that looks like it stepped right out of a high-end food magazine. With the glistening amber glaze and those irresistible sugar-pulls, these bars are guaranteed to disappear the moment you set them out.
If you loved the crunch and the golden caramel of this recipe, please leave a comment below and let us know how yours turned out! Don’t forget to follow us on Pinterest for more gourmet inspiration and pin these images to your favorite dessert boards!