If you are searching for the ultimate tropical escape delivered straight to your dinner table, this baked huli huli chicken is the answer. Inspired by the roadside stands of Hawaii, this recipe transforms humble chicken thighs into a masterpiece of texture and flavor. We aren’t just making dinner; we are engineering a sensory experience defined by charred skin, syrupy glaze, and caramelized fruit.
The beauty of this sheet pan method lies in the contrast between the savory, salty soy base and the bright, acidic sweetness of fresh pineapple. Unlike traditional grilling, baking this dish allows the juices from the red onion petals and blistered bell peppers to mingle with the chicken drippings, creating a complex sauce right on the pan. Every bite offers a perfect balance of umami and island sweetness.
This recipe is designed for the home cook who craves restaurant-quality results without the fuss of a charcoal pit. By following our specific basting technique, you will achieve that iconic mahogany finish that looks as good as it tastes. Let’s dive into the science of the perfect Hawaiian glaze and how to achieve that professional char in a standard home oven.
Why This Hawaiian Sheet Pan Chicken Works
- Structural Glaze Perfection: The mahogany pineapple glaze is thickened to a syrupy consistency, ensuring it clings to the chicken rather than sliding off into the pan.
- Textural Contrast: We achieve bubbled, charred skin through a high-heat roasting process that mimics the traditional “huli” (turning) method of open-flame cooking.
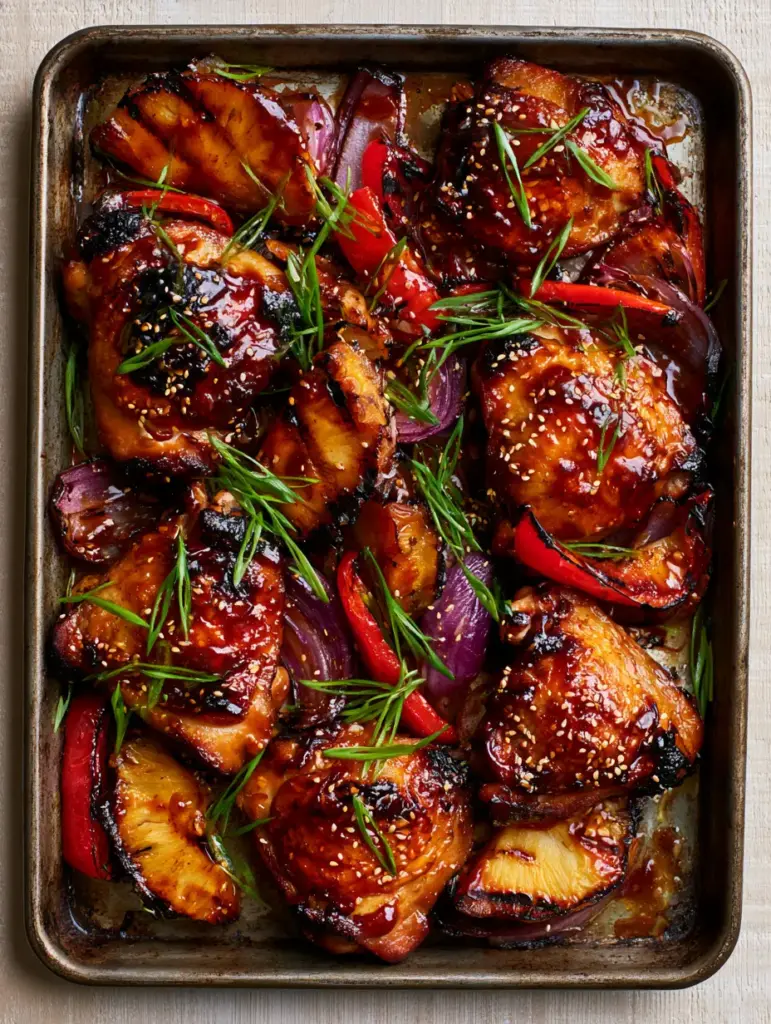
- Visual Vibrancy: The combination of blistered red bell pepper strips, roasted red onion petals, and bright green scallions creates a professional plate presentation.
- One-Pan Simplicity: By roasting the chicken alongside thick wedges of fresh pineapple, the fruit caramelizes and develops deep grill marks, providing a jammy sweetness to every forkful.
The Foundation: Essential Ingredients for Mahogany Glaze
To achieve the visual and flavor profile of authentic baked huli huli chicken, you need specific ingredients that contribute to both color and viscosity. This isn’t just a marinade; it’s a lacquer that builds layers of flavor as it roasts.
Bone-In, Skin-On Chicken Thighs: You need approximately 3 lbs (1.36kg) of thighs. The skin is essential for achieving the charred, bubbled texture described in our visual blueprint, while the bone keeps the meat juicy during the high-heat glaze reduction.
Fresh Pineapple Juice: 1 cup (240ml) serves as the acidic base. The natural bromelain in the juice helps tenderize the protein, while the sugars provide the foundation for the mahogany caramelization.
Soy Sauce (or Tamari): 1/2 cup (120ml) provides the deep umami and the dark pigment necessary for that syrupy, dark finish. If you enjoy this flavor profile, you might also love our garlic chicken lo mein for a quick weekday meal.
Dark Brown Sugar: 1/2 cup (100g) packed. This is non-negotiable for the “sticky” factor. The molasses in dark brown sugar aids in achieving the deep reddish-brown hue seen in the professional photos.
Ketchup: 1/4 cup (60ml) adds body and a slight vinegary tang that balances the sweetness of the pineapple. It also acts as a thickening agent for the glaze.
Aromatic Base: 2 tbsp (30g) of fresh grated ginger and 4 cloves of minced garlic. These invisible ingredients provide the fragrant backbone of the dish, ensuring the scent is as enticing as the visual char.
Vegetable Components: 1 large red onion cut into thick petals and 2 red bell peppers sliced into wide strips. These will soften and blister, absorbing the chicken fat and glaze as they roast.
The Garnish: 1/4 cup (25g) of thin bias-cut green scallions and 1 tbsp (9g) of toasted white sesame seeds. These provide the final pop of color and a subtle crunch that breaks up the richness of the glaze.
Must-Have Kitchen Tools for the Perfect Char
Achieving the specific “rustic dark metal sheet pan” look requires the right equipment. A heavy-duty rimmed baking sheet is essential to prevent warping at high temperatures and to ensure the glaze pools slightly around the vegetables without overflowing.
A pastry brush is your best friend for this recipe. You will be basting the chicken multiple times during the final stages of cooking to build up that glossy, mahogany layer. If you’re a fan of these sticky, glazed textures, be sure to check out our crispy honey chicken for another favorite.
An instant-read meat thermometer is the only way to guarantee the chicken stays juicy. While we want the skin charred and bubbled, the internal temperature should hit exactly 165°F (74°C) to maintain that “juicy” quality shown in the daylight photography.
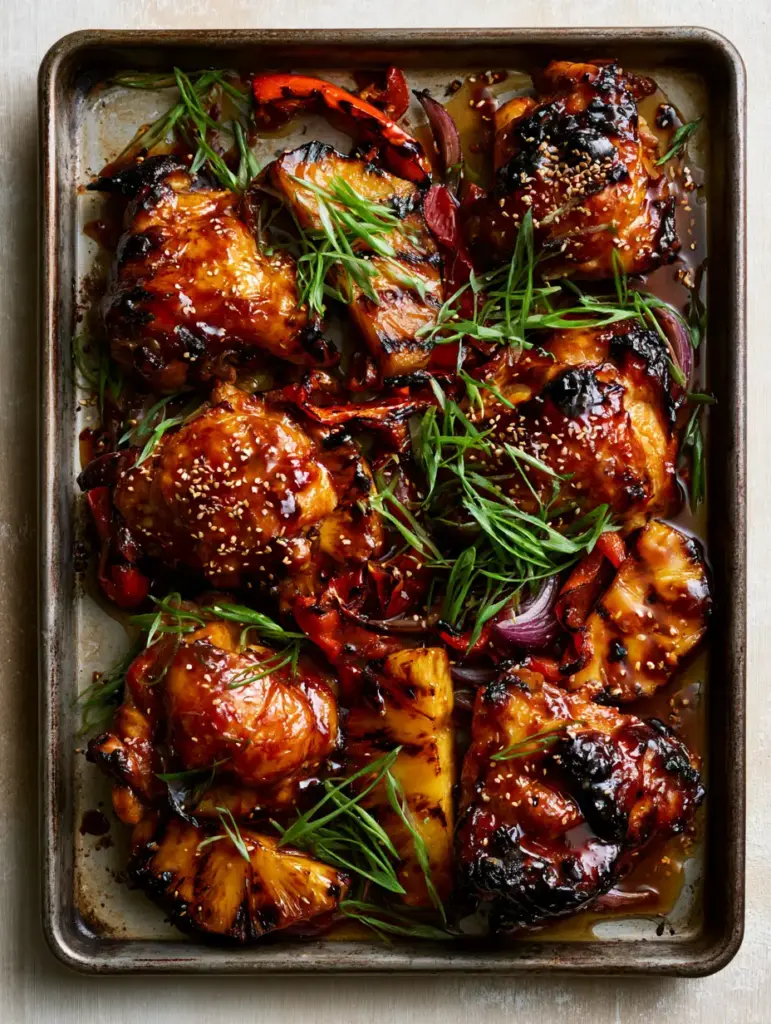
Step-by-Step Instructions for Baked Huli Huli Chicken
Phase 1: The Flavor Infusion
In a medium bowl, whisk together the pineapple juice, soy sauce, brown sugar, ketchup, ginger, garlic, and a pinch of kosher salt. Reserve 1/2 cup (120ml) of this liquid to use as your final basting glaze later.
Place the chicken thighs in a large freezer bag and pour in the remaining marinade. Let them rest in the refrigerator for at least 2 hours, though overnight is preferred. This ensures the seasoning penetrates deep into the muscle fibers.
Phase 2: Preparing the Sheet Pan
Preheat your oven to 425°F (220°C). This high temperature is critical for blistering the peppers and onion petals. Lightly grease your dark metal sheet pan with a neutral oil like canola or grapeseed oil.
Arrange the marinated chicken thighs skin-side up on the pan, leaving space between them. Scatter the red onion petals, red bell pepper strips, and thick fresh pineapple wedges around the chicken. Drizzle the vegetables lightly with oil and a sprinkle of salt to aid in caramelization.
Phase 3: The Initial Roast & Blister
Slide the pan into the center of the oven. Roast for 20-25 minutes. During this time, you will hear the chicken fat rendering and see the edges of the onion petals start to soften and brown. The pineapple wedges should begin to develop those dark, syrupy marks where they touch the metal pan.
Phase 4: Building the Mahogany Glaze
While the chicken roasts, take your reserved 1/2 cup of marinade and simmer it in a small saucepan over medium heat until it reduces by half. It should become a thick, glossy, and syrupy glaze that coats the back of a spoon.
Open the oven and liberally brush each chicken thigh with the reduced glaze. Return to the oven for 5 minutes. Repeat this basting process 2-3 times. This “layering” technique is the secret to the bubbled, charred skin and the deep mahogany color.
Phase 5: The Final Broil & Garnish
For the final 2-3 minutes, switch the oven to broil. Watch closely! You want the skin to bubble and char at the very edges, and the red bell peppers to show distinct blister marks. Remove the pan from the oven once the chicken looks glossy and the pineapple is caramelized.
Immediately garnish the hot pan with a heavy dusting of thin bias-cut green scallions and toasted white sesame seeds. The heat from the chicken will slightly toast the scallions, releasing their aroma.
Expert Tips for Professional Results
- Dry the Skin: Before the final basting, if the skin looks too wet, pat it gently with a paper towel. This allows the glaze to “stick” and caramelize rather than just steaming the skin.
- Don’t Crowd the Pan: If the vegetables are piled on top of each other, they will steam instead of roasting. Use two pans if necessary to ensure the red onion petals get those crispy, roasted edges.
- Fresh vs. Canned: Always use fresh pineapple wedges for the pan. Canned pineapple is too soft and will disintegrate under the high heat required for baked huli huli chicken.
- The Resting Period: Let the chicken rest on the pan for 5 minutes before serving. This allows the syrupy glaze to set and the juices to redistribute within the thighs.
The Science of Storage and Reheating
Leftover huli huli chicken is a gift. The flavors of the ginger and garlic continue to deepen overnight. Store any leftovers in an airtight container for up to 4 days in the refrigerator. The glaze will thicken even further when cold.
To reheat, avoid the microwave if you want to preserve the charred skin. Instead, place the chicken and vegetables back on a sheet pan and heat in a 350°F (175°C) oven for 10-12 minutes. This will revive the glossy texture of the pineapple glaze without drying out the meat.
Freezing is possible, though the texture of the roasted peppers and onions will change. If you must freeze, store the chicken in a vacuum-sealed bag with extra glaze for up to 3 months.
Perfect Pairings for a Hawaiian Feast
This bold, sticky chicken needs a side dish that can handle the intensity of the mahogany glaze. A simple scoop of steamed jasmine rice is traditional, as it soaks up all the extra pineapple juices from the pan.
For a lighter option, serve this alongside a crisp fresh spinach salad with a citrus vinaigrette. The acidity of the salad cuts through the richness of the chicken skin beautifully. If you’re looking for something more substantial, our teriyaki pineapple stuffed peppers offer a similar flavor profile in a different format.
If you’re hosting a larger gathering, consider adding a side of avocado ranch burritos for a fusion-style buffet that will keep everyone satisfied.
Frequently Asked Questions
Fresh pineapple is highly recommended because it holds its shape and caramelizes better. Canned pineapple contains more moisture and can become mushy at high roasting temperatures.
You can, but breasts dry out faster. If using breasts, reduce the initial roasting time and ensure you baste frequently to keep the meat moist under the high heat.
In the oven, you don’t need to flip the chicken because the convection heat circulates. Instead, we ‘turn’ the flavor by basting the top skin multiple times to build the glaze layers.
Roasting at a high temperature (425°F) and finishing with a brief 2-3 minute broil is the secret to achieving the bubbled texture and charred edges without overcooking the meat.
The combination of dark brown sugar, soy sauce, and ketchup, reduced into a syrupy glaze and basted multiple times, creates that signature dark, glossy finish.
The Ultimate Baked Huli Huli Chicken Recipe
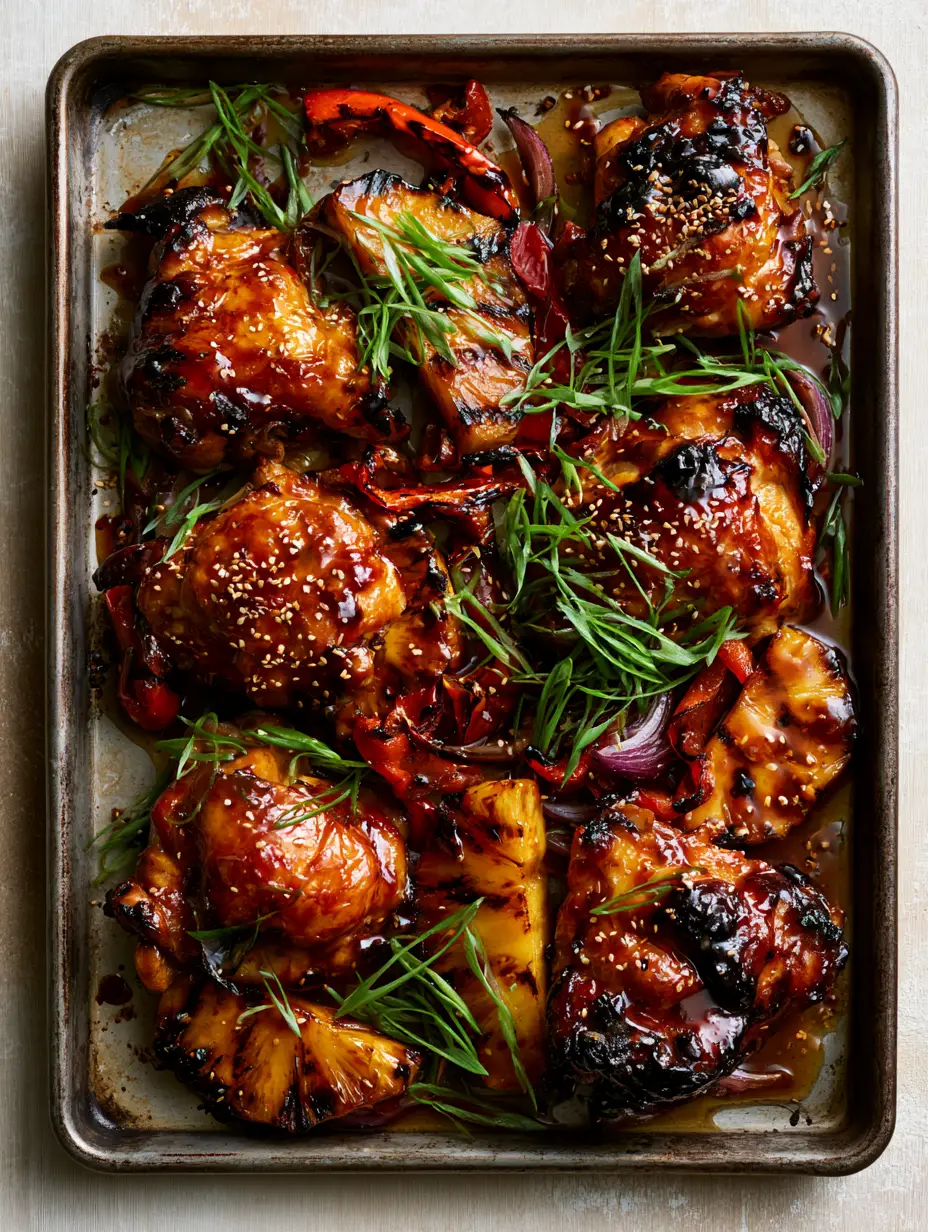
Baked Huli Huli Chicken with Mahogany Pineapple Glaze
Ingredients
Equipment
Method
- Whisk pineapple juice, soy sauce, brown sugar, ketchup, ginger, and garlic. Reserve 1/2 cup (120ml) for basting. Marinate chicken in the rest for 2-24 hours.
- Preheat oven to 425°F (220°C). Place chicken on sheet pan. Surround with pineapple wedges, onion petals, and pepper strips. Drizzle veggies with oil.
- Roast for 20-25 minutes until chicken starts to brown and vegetables soften.
- Simmer reserved marinade in a saucepan until thickened into a syrupy mahogany glaze.
- Brush glaze onto chicken. Roast 10-15 more minutes, basting every 5 minutes. Broil for 2 minutes at the end to char edges and blister peppers.
- Garnish with scallions and sesame seeds. Let rest for 5 minutes before serving.
Notes
Use bone-in chicken to prevent the meat from drying out during the high-heat roasting process.
Bring the Spirit of the Islands Home
This baked huli huli chicken is more than just a meal; it’s a vibrant, sticky, and deeply satisfying culinary journey. With its charred skin, mahogany glaze, and perfectly roasted vegetables, it’s a dish that commands attention at any dinner table. The combination of sweet pineapple and savory soy is a timeless duo that never fails to impress.
We hope you enjoy making this Hawaiian-inspired masterpiece as much as we enjoyed developing it. If you try this recipe, please leave a comment below and let us know how your char turned out! Don’t forget to share your beautiful sheet pan photos and tag us on Pinterest.