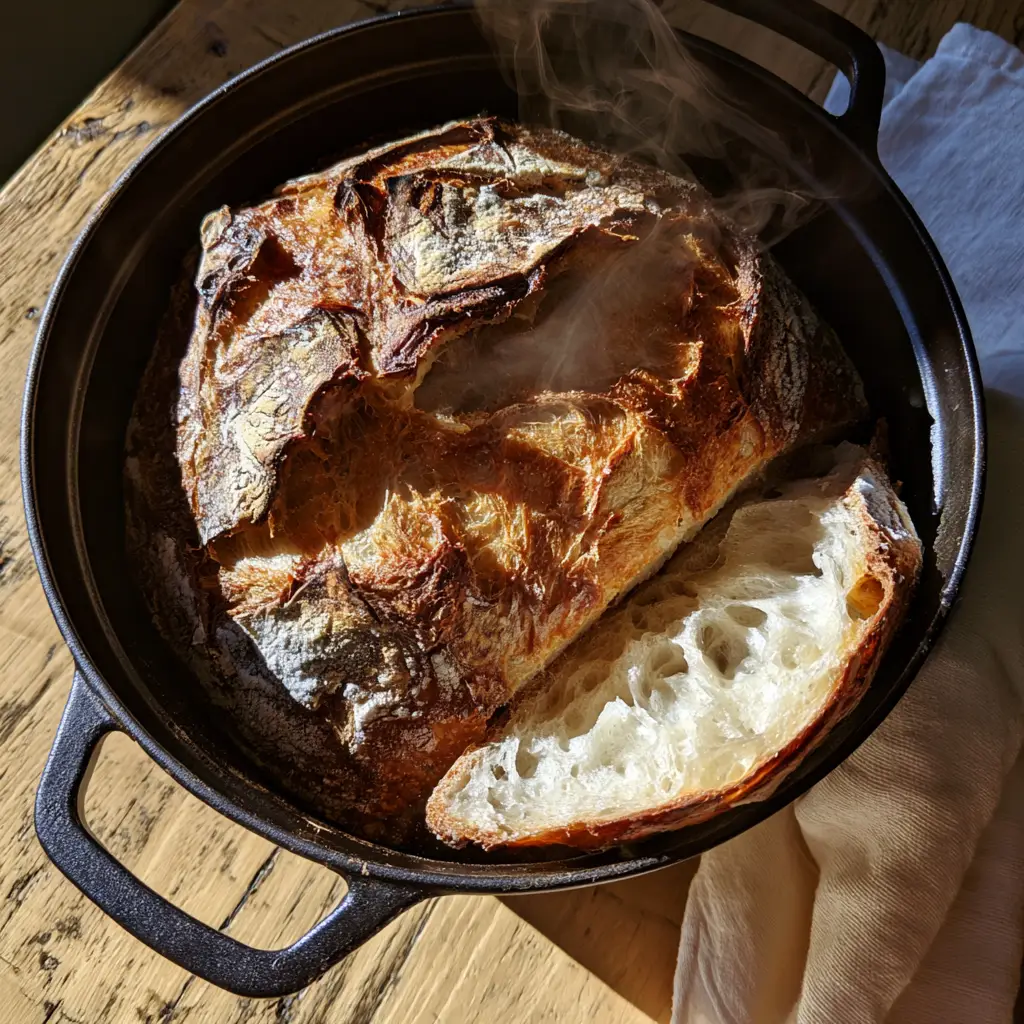
There is nothing quite like the intoxicating aroma of a fresh homemade bread recipe wafting through your kitchen on a crisp morning. Imagine pulling a heavy, matte black cast iron Dutch oven from the heat, lifting the lid to reveal a deeply browned, crackly crust dusted with a fine layer of white flour. As you make that first cut, a wisp of hot steam escapes, revealing a soft, porous white interior crumb that is just waiting for a smear of salted butter.
This homemade bread recipe is designed for those who crave the rustic beauty of a bakery-style loaf without the professional equipment. By using a simple no-knead technique and the steam-trapping power of a Dutch oven, you can achieve world-class results at home. Whether you are serving this alongside a bowl of homestyle chicken noodle soup or using it for the ultimate sandwich, this loaf is a showstopper.
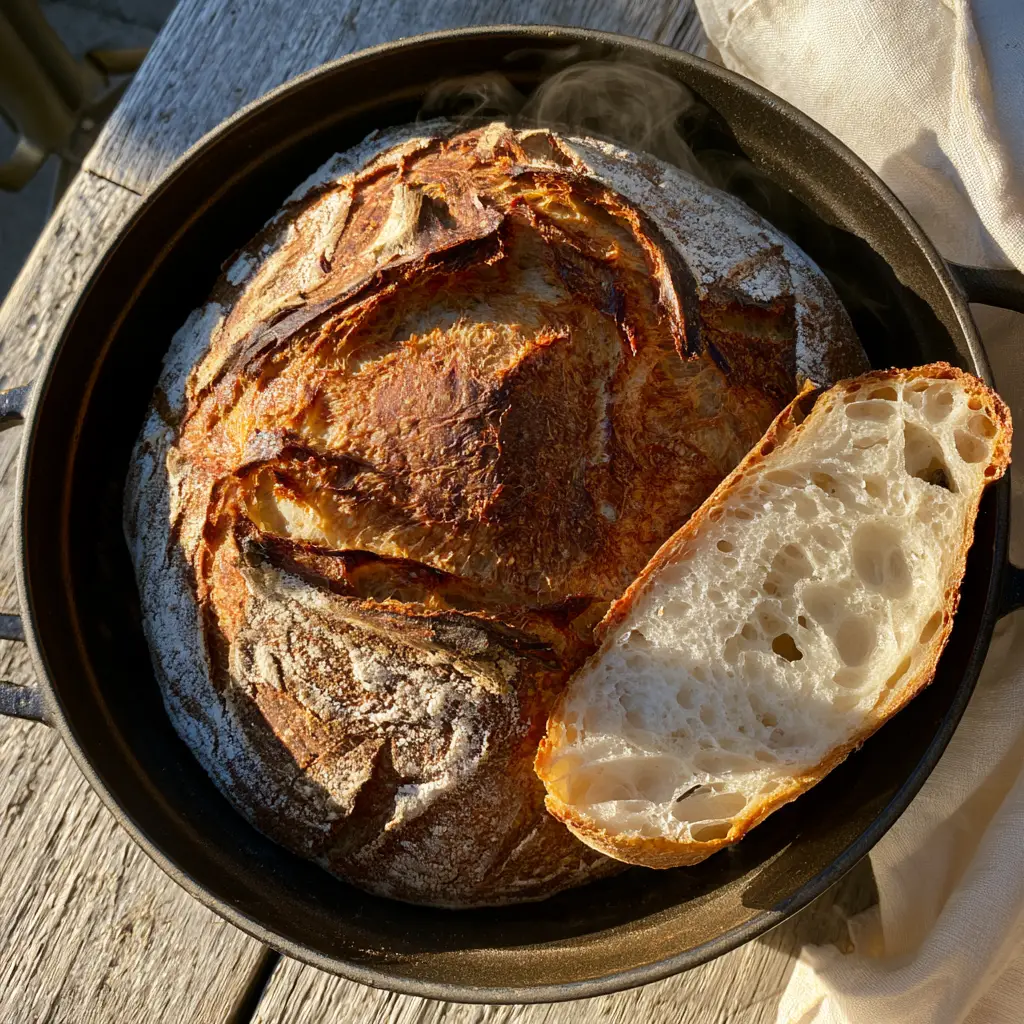
Why This Artisan Homemade Bread Recipe Always Wins
- The Perfect Crackle: We use high-heat steam to create a crust that is deeply golden-brown and shatteringly crisp.
- Airy Interior: The high-hydration dough ensures a soft, porous interior crumb with large, beautiful bubbles.
- Visual Masterpiece: With vertical expansion scores and a light flour dusting, this loaf looks like it belongs on a professional food blog.
- Minimal Effort: No intense kneading is required; time and fermentation do the heavy lifting for you.
Mastering this homemade bread recipe is about understanding the relationship between moisture and heat. When we bake inside a Dutch oven, we create a micro-environment that mimics professional steam-injection ovens. This allows the dough to expand fully before the crust sets, resulting in those iconic vertical expansion scores seen in the visual blueprint.
Essential Ingredients for a Better Boule
To achieve the specific textures described in our visual blueprint, each ingredient plays a critical role in the chemical reaction of baking. Do not skip the quality of your flour, as it dictates the strength of your crumb.
- Bread Flour: 3 cups (450g). High protein content is essential for developing the gluten structure needed for a soft porous white interior crumb.
- Warm Water: 1 ½ cups (355ml). This provides the hydration (approx 78%) needed for large air bubbles. It should be around 105°F (40°C).
- Active Dry Yeast: 1 teaspoon (4g). This provides the lift and the vertical expansion during the “oven spring” phase.
- Sea Salt: 1 ½ teaspoons (9g). Salt controls the yeast fermentation and is the primary flavor enhancer for the flour.
- Extra Flour for Dusting: 2 tablespoons (30g). Used for the aesthetic white flour dusting on the deeply browned crust.
If you find yourself making this loaf often, you might also enjoy pairing it with a hearty hearty bean soup for a complete, rustic meal. The thick crust is perfect for dipping into rich, savory broths.
The Science of the Dutch Oven Method
Why do we use a matte black cast iron Dutch oven? Cast iron is an incredible heat conductor. By preheating the pot, we hit the dough with a burst of intense energy the moment it enters the oven. This causes the gases inside the dough to expand rapidly—a phenomenon known as “oven spring.”
The lid is equally important. It traps the moisture escaping from the dough, creating a steamy environment. This steam keeps the surface of the loaf supple for the first 20 minutes of baking, allowing the bread to grow. Without steam, the crust would harden too early, resulting in a dense, small loaf rather than the airy, rustic boule we are aiming for.
Step 1: Mixing the Shaggy Dough
In a large glass bowl, whisk together your bread flour, yeast, and sea salt. Slowly pour in the warm water. Use a wooden spoon or your hands to mix until a shaggy, sticky ball forms. There should be no dry flour streaks remaining.
Visual Cue: The dough will look messy and unrefined at this stage. Do not be tempted to add more flour! High hydration is the secret to that soft porous white interior crumb described in the visual blueprint.
Step 2: The Long Cold Ferment
Cover the bowl tightly with plastic wrap or a damp cream linen textile. Let the dough sit at room temperature for 2 to 3 hours, then move it to the refrigerator for at least 12 to 18 hours. This cold fermentation develops the complex, slightly tangy flavor that defines artisan bread.
During this time, the gluten will align itself naturally. This is why we don’t need to spend 20 minutes kneading the dough by hand. The yeast works slowly, creating tiny pockets of carbon dioxide that will later become the beautiful bubbles in your bread.
Step 3: Shaping and Final Proof
Turn the cold dough onto a lightly floured light oak wood surface. Gently fold the edges toward the center to create tension, forming a round boule. Place the dough onto a piece of parchment paper, cover with a linen napkin, and let it rise for another 45-60 minutes.
While the dough proofs, place your matte black Dutch oven (lid included) into the oven and preheat it to 450°F (230°C). The pot must be screaming hot before the bread goes in.
Step 4: Scoring and Baking for Vertical Expansion
Just before baking, use a sharp knife or a bread lame to create vertical expansion scores on the top of the loaf. These deep cuts (about ½ inch deep) direct the growth of the bread. Dust the top with a fine layer of white flour for that classic rustic aesthetic.
Carefully lower the parchment paper and dough into the hot Dutch oven. Cover with the lid and bake for 30 minutes. The steam trapped inside will ensure the bread expands perfectly along your score lines.
Step 5: Developing the Deeply Browned Crusty Bread
Remove the lid of the Dutch oven. You will see a pale, expanded loaf. Continue baking for another 12-15 minutes without the lid. This is where the magic happens. The direct dry heat will caramelize the exterior, creating a deeply browned crusty bread boule.
Sensory Cue: You will know it is done when the crust is dark mahogany and the loaf sounds hollow when tapped on the bottom. The smell of toasted grain should fill your entire home.
Expert Tips for Success
- Use a Scale: While we provide imperial units, measuring by weight (grams) is the only way to ensure 100% consistency in your homemade bread recipe.
- Don’t Rush the Cooling: As tempting as it is to cut into the loaf while wisps of hot steam are still visible, wait at least 30 minutes. The bread is actually still “cooking” inside as it cools. Cutting too early can lead to a gummy texture.
- Check Your Yeast: If your yeast doesn’t foam slightly when mixed with water, it might be dead. Always use fresh yeast for the best vertical expansion.
- Preheat Thoroughly: Let your Dutch oven sit in the hot oven for at least 30 minutes before adding the dough to ensure maximum heat retention.
If you’re looking for more comforting carbs, don’t miss our creamy baked macaroni and cheese, which pairs excellently with a side of this crusty bread.
Storage, Reheating & Freezing
Storage: Store the cooled loaf in a brown paper bag at room temperature for up to 2 days. Avoid plastic bags, as they will soften the crackly crust and make it chewy.
Freezing: You can freeze the whole loaf or individual slices. Wrap tightly in foil and then place in a freezer-safe bag. It will stay fresh for up to 3 months. To reheat, bake the frozen loaf at 350°F (175°C) for 10-15 minutes to restore the crunch.
Reheating: If a slice has gone stale, a quick toast will revive the soft porous white interior crumb. You can also use older bread for a decadent berries and cream stuffed french toast casserole.
What to Serve With This Homemade Bread
This rustic boule is incredibly versatile. It is the perfect vessel for soaking up the juices of a savory potato dish or serving alongside a bowl of easy vegetable soup.
For a fancy brunch, slice it thick and top with avocado, poached eggs, and a sprinkle of chili flakes. Or, keep it simple: warm a slice and dip it into high-quality olive oil and balsamic vinegar. The deeply browned crust provides a smoky contrast to the fruity notes of the oil.
Frequently Asked Questions
Yes, but you will need to add a pan of hot water to the bottom of your oven to create steam, which is essential for the crust to expand and crackle.
While you can bake it after a 3-hour room temp rise, the cold ferment in the fridge develops the artisan flavor and makes the dough easier to handle.
Bread flour is highly recommended due to its high protein content, which creates a stronger gluten network for a taller loaf and better vertical scores.
A dense crumb is usually caused by under-hydration or old yeast. Ensure you use the full 1.5 cups of water and fresh active dry yeast to get those large air bubbles.
The Ultimate Homemade Bread Recipe Card
homemade bread recipe: The Ultimate Crusty Dutch Oven Artisan Boule
Ingredients
Equipment
Method
- Whisk dry ingredients and stir in warm water until a shaggy dough forms.
- Cover and let rise at room temperature for 3 hours, then refrigerate for 12-18 hours.
- Shape into a round boule on a floured light oak surface and proof for 1 hour.
- Dust with white flour and make deep vertical expansion scores.
- Bake in a preheated matte black Dutch oven at 450°F for 30 minutes with the lid on.
- Remove lid and bake for 15 more minutes until the crust is deeply browned and crackly.
Notes
Wait for the bread to cool before slicing to preserve the crumb structure.
Join the Bread Baking Community!
We want to see your beautiful, rustic creations! If you made this homemade bread recipe, please leave a 5-star rating and a comment below. Did you get those perfect vertical expansion scores? Did your crust crackle?
Don’t forget to Save this recipe to your Pinterest Bread Board so you can find it later! Follow @gloss_gourmet for more artisan baking tips and comfort food inspiration. Share a photo of your steaming loaf in the comments—we love seeing your kitchen successes!