Dinner rolls are the undisputed crown jewel of any table, providing that pillowy, cloud-like comfort that turns a simple meal into a feast. There is nothing quite like the aroma of yeast dough rising in a warm kitchen, promising a batch of dinner rolls that are ultra-fluffy with a visible airy crumb. Whether you are hosting a holiday gala or just looking for the perfect vessel to soak up a hearty stew, mastering the art of the yeast roll is a culinary rite of passage that yields the most delicious, golden-brown rewards.
Why These Are the Best Dinner Rolls You Will Ever Bake
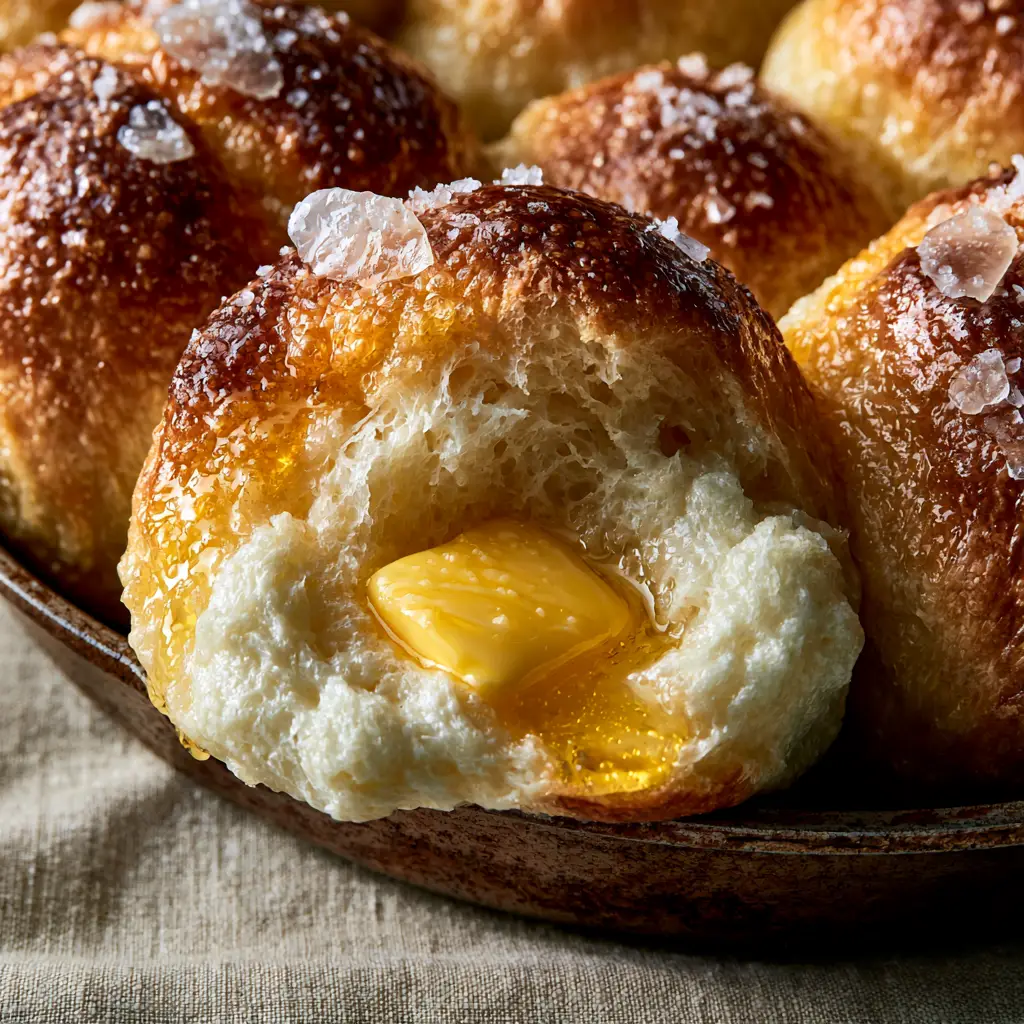
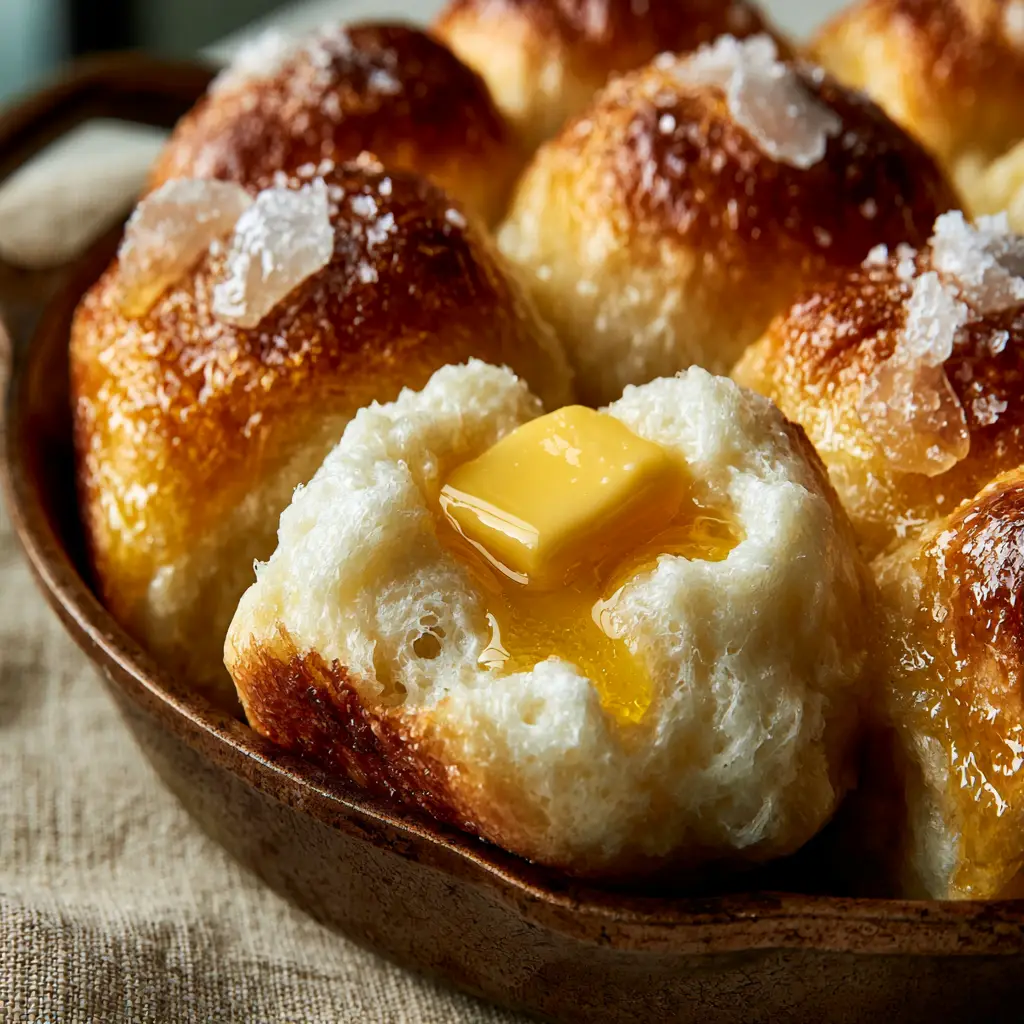
- Ultra-Fluffy “Cloud” Texture: These dinner rolls feature an airy steamed bread crumb that stays soft for days.
- The Skillet Secret: Baking in a rustic cast iron skillet creates a superior golden brown toasted crust and even heat distribution.
- Liquid Gold Glaze: A generous coating of melted salted butter creates a glistening finish that enhances every bite.
- The Finishing Touch: Large, translucent flaky sea salt crystals provide a sophisticated crunch and flavor contrast.
- Melting Center: Specifically designed to hold a melting solid butter pat in the warm, torn-open center.
Creating the perfect dinner rolls requires more than just mixing flour and water; it is about managing the hydration and enrichment of the dough. By using a combination of whole milk and high-quality butter, we ensure a rich mouthfeel that pairs perfectly with homestyle chicken noodle soup or a thick, comforting loaded potato soup.
Essential Ingredients for Pillowy Dinner Rolls
Bread Flour: 4 cups (500g). While all-purpose works, bread flour provides the protein necessary for that specific dinner rolls structure and height.
Whole Milk: 1 ¼ cups (300ml). Warmed to 110°F (43°C). Milk sugars help with browning the crust, while the fat tenderizes the crumb.
Active Dry Yeast: 2 ¼ tsp (7g) or one standard packet. This is the engine of our dinner rolls, providing the lift and airy crumb.
Honey or Granulated Sugar: 3 tbsp (45ml). This feeds the yeast and provides a subtle hint of sweetness to balance the salty glaze.
Unsalted Butter (Softened): 4 tbsp (56g). Incorporated into the dough for a rich, brioche-adjacent texture.
Large Egg: 1 (room temperature). Adds structure and a beautiful golden hue to the interior of the bread.
Fine Sea Salt: 1 ½ tsp (9g). Essential for regulating yeast activity and seasoning the dough from within.
Melted Salted Butter: 3 tbsp (42g). For brushing the dinner rolls immediately after they exit the oven.
Flaky Sea Salt: For sprinkling. Those large crystals are vital for the visual and textural “Visual Recipe Blueprint.”
Step-by-Step Guide to Perfect Skillet Dinner Rolls
Activating the Yeast and Mixing the Dough
Begin by whisking your warm milk (ensure it is not too hot, or you will kill the yeast!) with the honey and yeast in a large bowl. Let it sit for 5-10 minutes until a thick, frothy foam forms on top. This “bloom” is the first sign of successful dinner rolls.
Add the egg and softened butter to the yeast mixture. Gradually stir in the bread flour and fine sea salt. If using a stand mixer, use the dough hook on low speed until a shaggy dough forms. The dough for these dinner rolls should be slightly tacky but not stick to your fingers.
The Art of the Knead
Knead the dough for 8-10 minutes by hand or 5-7 minutes in a mixer. You are looking for the “windowpane effect,” where a small piece of dough can be stretched thin enough to see light through it without tearing. This ensures the dinner rolls will have that airy, steamed crumb once baked.
Place the dough in a lightly greased bowl, cover with a warm beige linen or plastic wrap, and let it rise in a draft-free spot for 60-90 minutes. It should double in size, appearing light and full of air.
Shaping for the Cast Iron Skillet
Gently punch down the risen dough. Divide it into 12-15 equal pieces (approx 75g each for precision). Roll each piece into a tight, smooth ball by tensioning the dough against your work surface. Arrange the balls in a well-buttered 10-inch or 12-inch cast iron skillet. The dinner rolls should be just barely touching.
Cover and let rise a second time for 45 minutes. They will expand and “pull apart” once baked. This second rise is crucial for the ultra-fluffy interior seen in the hero roll photo.
Baking to Golden Perfection
Preheat your oven to 375°F (190°C). Place the skillet on the center rack. Bake for 20-25 minutes. Watch for the dinner rolls to transform into a deep golden-brown toasted crust. The internal temperature should reach 190°F (88°C) for the perfect airy steamed crumb.
The Glistening Butter Glaze
As soon as you pull the skillet from the oven, brush the tops generously with the melted salted butter. The dinner rolls will absorb the fat, creating a glistening liquid gold pool in the crevices. Immediately sprinkle with the flaky sea salt crystals so they adhere to the butter.
Expert Tips for Success
- Room Temperature Ingredients: Ensure your egg and butter are not cold; this prevents the yeast from going dormant and ensures even dinner rolls.
- Don’t Over-Flour: If the dough is sticky, resist the urge to add too much flour. A higher hydration leads to a more “cloud-like” white interior.
- The Skillet Advantage: If you don’t have cast iron, a ceramic baking dish works, but you may lose some of that specific toasted crust texture.
- Steam the Interior: For the softest dinner rolls, cover the skillet with a clean towel for 5 minutes after buttering to trap the residual steam.
These rolls are the perfect companion for savory savory breakfast favorites or even as a side for creamy baked macaroni and cheese.
Storage, Reheating & Freezing
Storage: Keep leftover dinner rolls in an airtight bag at room temperature for up to 3 days. To maintain softness, place a small piece of parchment paper in the bag.
Reheating: Wrap the dinner rolls in foil and heat in a 350°F (175°C) oven for 10 minutes. This restores the “steaming” interior and softens the butter pat once added.
Freezing: These rolls freeze beautifully. Flash freeze on a tray, then transfer to a freezer bag for up to 3 months. Thaw at room temperature and reheat as directed above.
What to Serve With This
While these dinner rolls are a meal on their own, they truly shine when served alongside a bowl of easy vegetable soup or as a side for a Sunday roast. If you have leftovers (rare!), they make incredible sliders or can be used in a croissant breakfast casserole style bake for a savory twist.
Frequently Asked Questions
Yes! You can shape the rolls, place them in the skillet, cover tightly, and refrigerate overnight. Let them come to room temperature and finish rising for about 60 minutes before baking the next day.
The secret is brushing the rolls with melted salted butter the second they come out of the oven. The heat of the rolls absorbs the butter, creating that liquid gold shine.
Bread flour is best because its higher protein content creates a stronger gluten network, leading to a taller, fluffier roll with a better airy crumb compared to all-purpose flour.
Dense rolls usually result from either inactive yeast or not enough proofing time. Ensure your milk is the correct temperature to bloom the yeast and let the dough double in size during both rises.
The Ultimate Skillet Dinner Rolls Recipe Card
Dinner Rolls: The Ultimate Fluffy Skillet Recipe with Salted Butter Glaze
Ingredients
Equipment
Method
- Combine warm milk, honey, and yeast. Let sit for 10 minutes until frothy.
- Add egg, softened butter, flour, and salt. Knead for 8-10 minutes until smooth and the windowpane test is passed.
- Place in a greased bowl, cover with a linen, and let rise for 90 minutes in a warm spot.
- Divide dough into 12-15 equal pieces. Roll into tight balls and place in a buttered cast iron skillet.
- Cover and let rise for 45 minutes until doubled and touching each other.
- Bake at 375°F (190°C) for 20-25 minutes until golden brown.
- Brush with melted salted butter and sprinkle with flaky sea salt immediately. Serve warm with a melting pat of butter in the center.
Notes
Ensure the milk is between 105°F and 115°F to properly activate yeast without killing it.

Save This Recipe to Pinterest!
Did you fall in love with that melting butter pat and the golden crust? Make sure to save this recipe to your Pinterest boards so you never lose it! We love seeing your kitchen successes—post a photo of your dinner rolls in the comments below or tag @gloss_gourmet on social media. Don’t forget to leave a 5-star rating in the recipe card if these rolls are now your new family favorite!
Looking for something sweet next? Try our red velvet cinnamon rolls for your next brunch!